






One Artsy Mama One Artsy Mama One Artsy Mama One Artsy Mama blog lovin'

June 17, 2012

Round 5: Stencil Projects and VOTE!

I can't believe it.  It's time for the very last round in One Crafty Contest!  On one hand, I'll be glad to get back to my normal schedule, both in life and here on the blog, but on the other, I'm really going to miss seeing all these amazing, inspiring projects every week and interacting with these talented ladies.  So, this post is a little bittersweet for me.  Right now, you'll be voting on the three stenciled projects.  The results of the vote will determine who wins the prize for this round from our sponsor, Cutting Edge Stencils.  Then, come back Tuesday to vote for our grand prize overall winner in a SEPARATE vote.

In order for your vote to count, you have to click on "vote" BELOW the thumbnail you like.  I have no idea why the vote text is below rather than above the links this time, but so it is...
Here they are:

ENTRY A: Stenciled Adirondack and Pillow


This child-size teak adirondack chair only cost me $5 at a yard sale but was in need of a little TLC. After a good sanding, I used Cutting Edge Stencils Wall Art Stars to create a layered star design and included a monogrammed letter in the center for a personal touch. A patriotic pillow adds additional comfort and style. It is hand sewn with weather resistant fabric and is double-sided! One side is red with a blue/white stenciled star and the other side is blue with a red/white stenciled star. I know where my little one is going to be sitting to watch the fireworks this 4th of July!

ENTRY B: Stenciled End Table

My sister just moved into a new apartment, and I've been thinking on what to give her as a housewarming gift.  (Because we DIY-mamas love a handmade touch for all the gifts we give, don't we?)  When I asked her what she needed, the answer was: everything!  So I focused on the basics, hit up a couple yard sales in my neighborhood, and scored this lovely little end table.

Well, as you can see, it wasn't exactly lovely.  It needed to be brought out of the 70's, with the gold tones and the faux wood grain.  The knobs needed to go - they had obviously replaced what were originally handles, given their strange position.  As much as I wanted to overhaul it with a bold color, my sister prefers a much more conservative look, so I played it safe and went with a cameo white for my main color, and a nice muted accent color called au lait ole (fun, right?) for the base and the stencil.

I mixed up my own chalk paint for this project and ordered a custom stencil that would welcome her home every day.  Instead of a quote, I thought a dictionary definition would appeal most to her - we are both word nerds in the extreme!  I stenciled the top, where it will always be seen, did some light distressing, and then waxed the whole thing down with a couple coats of furniture wax.  For the final touches, I agonized over some gorgeous $8.50 knobs, but ultimately decided that I couldn't in good conscience spend that much on a furniture rescue, and went with a very practical, very simple set of $1.49 knobs from Lowe's instead.  I filled in the holes, and drilled new ones where they really belonged.  When it was finished, I loved it so much, I hardly wanted to give it away - fortunately, I will get to see it in my sister's new home anytime I want!

ENTRY C: Stenciled Bathroom Wall

I'm a bit bittersweet to describe the last project that this awesome crafty contest has pushed me to do!  I love working with Cutting Edge Stencils, their stencils are high quality and always result in an amazing project.  I've been wanting to add "a little something" to our Master Bathroom for quite sometime, and this round finally pushed me to do it.  I added a thick strip across the main wall in Valspar's "Cool Grey" in flat, and then using a Cutting Edge Stencil, applied the same color of Valspar's "Cool Grey" but in a high gloss.  This gave me a final appearance of white on white that is the perfect amount of high class and design I was looking to add to our Master Bathroom.  I love that it's a subtle sheen that makes the stencil design pop at different angles.

Ok, it's voting time!  Remember, you are voting just for the projects in this round.  The overall contest winner will be chosen via a separate vote on Tuesday.  The winner of this round will receive the stencil prize from our sponsor, Cutting Edge Stencils.  Click "vote" below the link you like to vote for your favorite project...just one vote per person this week!  Voting closes at noon EST on Tuesday the 19th.
Pin It!

Happy Father's Day!

Today, we celebrate the dads out there, and I especially want to wish a very Happy Father's Day to two very special ones in my life.

First, my own dad, who has been an amazing father to me.  He's famous for giving me just the right advice at just the right time, and he's always supported me in whatever I do.  He attended my 4-H fairs and competitions, never missed a performance of my high school showchoir {and was the first to give us a standing ovation}, and stood by me when I traded the security of a job in the public school system for a less stable career as a professional ballroom dancer.  We have a lot in common; our mutual love for the beach is just the tip of the iceberg.  When I was preparing to get married, he kept reminding me that I had promised as a little girl never to move out and leave him, and he threatened to sit at his own table in the corner at the reception, although when the day came, he was a perfect gentleman.  Dad, thanks for always being on my side and for showing me what a godly husband and father really is.


And, Happy Father's Day to my best friend, husband, and dance partner, who is the best father to our Little Crafter that I could ever have asked for.  I'm so thankful to have him in my life, and so glad that LC has him to look up to. 

Here's LC's tribute to his daddy:


I want to leave you with the lyrics to the song I chose for the dance I did with my dad at my wedding {10 yrs ago!!}  It's called "More Than You'll Ever Know" by Watermark...it's not specifically written for fathers, but the words always make me think of my dad and the relationship we have.


Something brought you to my mind today
I thought about the funny ways you make me laugh
And yet I feel like it's okay to cry with you
Something about just being with you
When I leave I feel like I've been near God
And that's the way it ought to be...


'Cause you've been more than a friend to me
You fight off my enemies
'Cause you've spoken the Truth over my life
And you'll never know what it means to me
Just to know you've been on your knees for me
Oh, you have blessed my life
More than you'll ever know, yeah, yeah, yeah


You had faith, when I had none
You prayed God would bring me a brand new song
When I didn't think I could find the strength to sing
And all the while I'm hoping that I'll
Do the kind of praying for you that you've done for me
And that's the way it ought to be...


Happy Father's Day, Dads!

Pin It!

June 16, 2012

Growing Your Blog: Reposting Etiquitte

Welcome to another installment of the Growing Your Blog Series!  Today we're going to be talking about the proper {at least according to me...lol} etiquitte for when you want to share a great idea you saw on someone else's blog.
From time to time, all of us see something somewhere else that we think is SUCH a great idea we have to share it with our readers, right?  That's part of the fun of blogging, all the inspiration we're able to gain and share.  And, done correctly, the person who came up with the idea will benefit from you sharing it as well.  But, done incorrectly, it can cause hard feelings and even become a copyright violation in some cases.  Here are some rules to follow when you want to repost someone else's idea.

There are three different scenarios in which we might want to share something created by a fellow blogger, and each has different guidelines.

SCENARIO 1: Someone inspired you with their project and you made your own version.

For this situation, the emphasis is on your own project.  It's totally fine to write the post as a normal tutorial, showing pictures of your work and the steps you followed.  Just make sure you put a link to your original inspiration, lest they and your readers think you're trying to claim their idea as your own.  You can simply credit them with a text link, saying something like, "I saw this fabulous Sentimental Word Art linked up at our party by Karah from The Space Between. I liked it so much I featured it, and then I just had to make my own version."
If you like, you can also copy and paste an image of your inspiration too so that your readers can see it.  Sometimes I do this, sometimes not, depending on the project.  The plus side is that it gives the original creator more exposure and is fun to see for your readers, the down side is that if it's the first image in your post, people might pin that photo instead of a photo of your actual project, which happened to me {a lot!} with my covered clothespins.  {The left image is my inspiration from Vixen Made; the right photo is my take on it!}
So, in summary, for this scenario, here are the:
RULES:
1. Use a text link to the specific post where your idea came from.
2. {Optional} include one photo of the inspiration.

*****************************************************
SCENARIO 2: You're doing a round-up or featuring projects from a link party.
The goal of featuring projects from your party or collecting projects you like that go with a particular theme is to give exposure to the people who created them, right?  Bloggers love to be featured, especially if your blog happens to be bigger than theirs, because done correctly  it will bring traffic their way.  The idea is that people will see the project, be interested, and click to visit the creator's blog for more information...which is why it's important to use the link for the specific post and not just the person's blog homepage.  Readers will be frustrated if they want to see a particular tutorial and end up on a homepage instead where they have to search for it.  This kind of featuring really does benefit the other blogger; for example, Jen from Tatertots and Jello was sweet enough to include my clothespin magnets {pictured above} in one of her roundups a few months back and according to my stats, that particular post is my 9th highest traffic source of all time!  Crazy!  When you're featuring another project in this manner, the best way to go is:
RULE: Use one good photo and a clear text link to the specific post.
For example:

Patriotic Jar Lanterns: Here's to Handy Andy
*****************************************************
SCENARIO 3: You see an idea you like on another blog and just want to share it.
So it's not something you've made yourself, and it's not an official party feature or roundup, you just like it and you think your readers will too.  What do you do?  Well, here's what NOT to do.
Never copy and paste an entire post!!!
The only time you should have an entire post written by someone else on your own blog is if you have a guest poster.  We all spend a lot of time and effort on each post we publish, and none of us wants to feel as though our work has been stolen.  Recently, I got an email from a sweet bloggy friend who found out that someone had copied and posted one of her tutorials...the title, the content, the photos, everything.  The other blogger had given her credit in a quick little text link at the top of the post, so I'm sure she didn't intend for it to look like she was stealing content, but we all know that  readers don't always read every single word of every post we write, right?  Send me a Starbucks gift card now.  You know you want to.  Haha, just checking.  Still with me?  Reading every word?  In all seriousness, though, people often skim, looking for the photos and the tutorial they want to see.  I'm guilty of it, and you probably are too.  So it's easy for someone to miss that quick little byline, know what I mean?  Which, even if the blogger had the best intentions, makes a lot of people think the project and post were her own.  Plus, it doesn't drive any traffic to my friend's blog because everything is already right there for readers to see.  Make sense?  So what's the best way to show your readers something you think is really cool?

RULE: Use one or two photos and a link to the specific post.  Give your readers a little tease telling them why they need to go see the project, then let them click over to the actual blog to find out more information.

For example, you could post something like this:

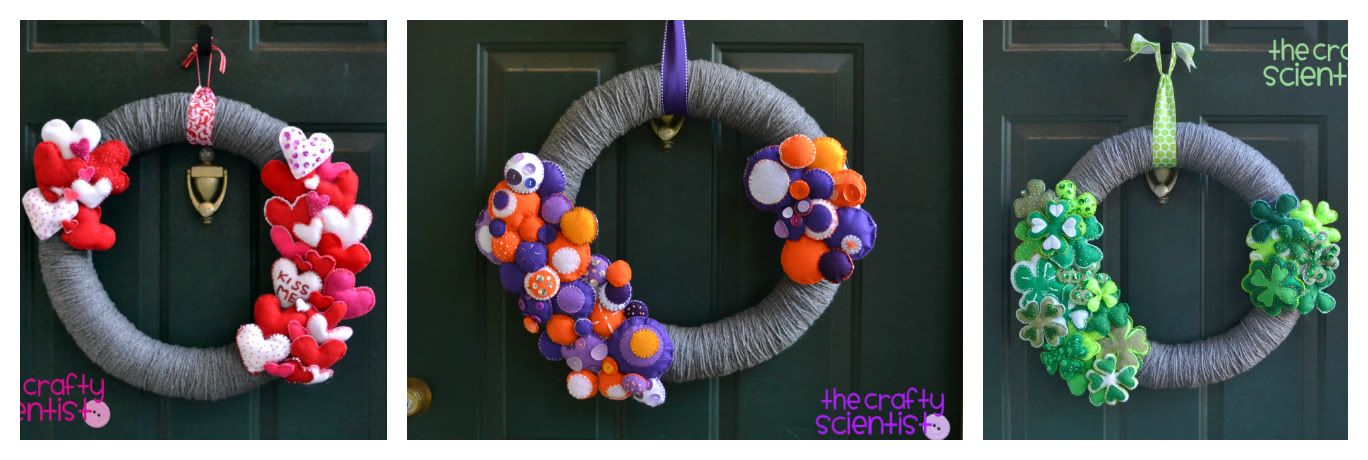
"Have you ever wished that instead of making a new wreath for every season, you could somehow just change the one you already have?  Mel over at The Crafty Scientist has figured out how to make a fun interchangable wreath that you can decorate for every season without damaging any of the parts!  You're going to love it; check out her post for a full tutorial!  Great work, Mel!"
********************************************************************************
In closing, I want to say one other thing that applies to any and all scenarios when you might be posting about someone else's work.
Take the time to read and respect fellow bloggers' wishes regarding their photos and content.
Many bloggers have a little blog policy blurb somewhere on their homepage giving information with respect to what they do and don't wish to be done with their intellectual property. 

Here's mine:
The contents of this blog, including text, original photos and ideas are the sole property of the author.  If you intend to use my text or images, please link back to this blog and give credit to One Artsy Mama.  Please do not republish an entire post or post photos of my family.
A notification email would be greatly appreciated too!

Allison, over at House of Hepworths, says it this way:
Bloggers/websites may NOT repost my blog content without my express permission. My tutorials belong exclusively on MY blog. They are my intellectual property. I've spent countless hours making these projects and I don’t want them living on someone else's site.
HOWEVER, linking to my project is perfectly fine and I encourage it! Those who link to a project of mine are welcome to take one or two photos and link each photo back to that specific post.

Some bloggers will limit how many photos they want you to use, others will ask you to refrain from posting photos with family members, and others will have various specific "rules" they want you to follow when it comes to reposting.  Being aware of and respectful of those things will go a long way.  After all, the blog community is a rather tightly knit one and it's much better to have friends than enemies who think you're trying to rip off their content, right?
Pinned Image
Also, if you don't have a blog policy on your own site, you may want to consider adding one!

Whew, ok.  That was a lot of info, huh?  But I feel like this is an important topic and worth addressing.  Was it helpful?

Happy blogging!


Pin It!
Related Posts Plugin for WordPress, Blogger...
Pin It button on image hover