One Artsy Mama One Artsy Mama One Artsy Mama One Artsy Mama blog lovin'
Showing posts with label flowerpot. Show all posts

May 16, 2013

My #MiracleGroProject

This post brought to you by Miracle-Gro. All opinions are 100% mine.
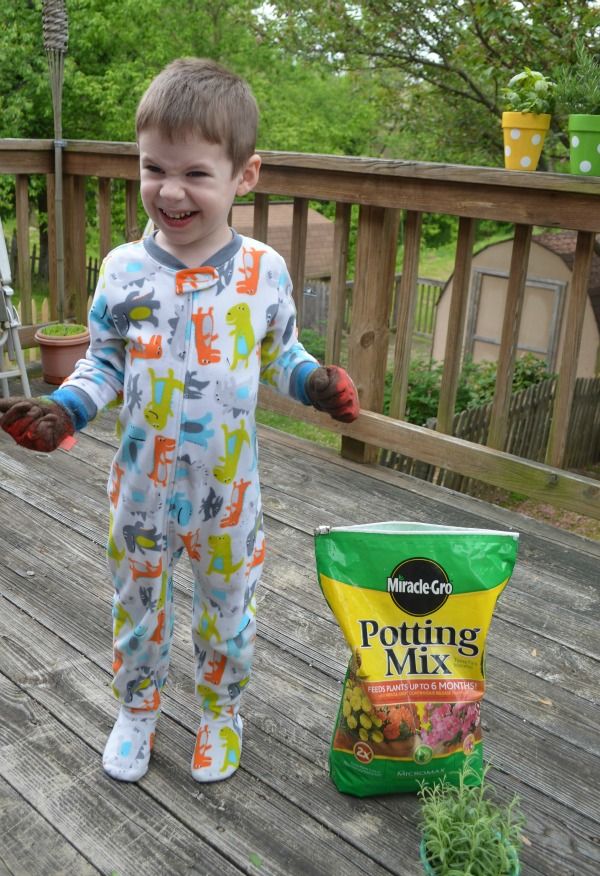
Hey, friends!  We are officially enjoying my favorite time of year.  I just love it when the weather is nice enough for our family to have fun doing outdoor activities together.  One of the things we always look forward to is planting flowers, vegetables, and herbs.  The older Little Crafter gets, the more of a help he can be, and he absolutely loves it.  Planting, watering, weeding...you name it, he wants to do it "all by myself!"  {and occasionally in his pajamas}.
Pin It!

May 7, 2013

Polka Dot Flowerpots

Do you plant a garden this time of year?  My favorite thing to grow is fresh herbs we can use in our meals.  This year, I saw some really adorable polka dot pots in Michaels, but didn't want to spend almost $5 a piece on them...so, Little Crafter and I decided to make our own!


Pin It!

March 6, 2013

Crafty Ladies Spring Projects

Hey, friends!  Remember last month when I shared with you about the first ever meeting of my real-life "Crafty Ladies" group and the fun decorative wooden blocks we made?  Well, we recently got together again to have some more girl-time and craft therapy.  This time, more ladies were able to join us for our spring projects.  


We had two projects, decorated flowerpots and decorated wooden eggs.  Everyone had the same stash of supplies to use: fabric, paint, Mod Podge, ribbon, jute, stamps and Staz-On ink.  Once again, I was just amazed by how differently each person's projects turned out even though we all had the same choices of materials.  Take a look at some of the finished products:
My friend "Short Jess" decided to cut a butterfly out of a piece of fabric in my stash and Mod Podge it on top of a coordinating fabric.  Then, she added ribbon and left the very top natural.

My friend Kelly painted her pot and added "Live Simply, Live Hopeful" around the rim with alphabet stamps.  She decided to use her eggs as plant markers when she and her hubby plant vegetables and herbs this year.

Another butterfly lover, my friend Sarah, used fabric on her flowerpot and painted her eggs in various spring colors.

My mom, Sherl, covered her pot in turquoise polka dot fabric and a contrasting bow.  She decorated her eggs with spring-y ribbon and small flowers.
My girl Erin, who I'm sure you remember from the Christmas Handprint Plaque and various other crafty adventures, made this fun flowerpot covered in turquoise fabric and eggs stamped with special words.
I am loving the pink eggs made by my friend Tall Jess...she trimmed scrapbook paper with pinking shears, wrapped it around the painted eggs, and finished it off with some twine.  She also used fun green fabric on her flowerpot and a wired twine accent.

I'm crazy about the eggs my friend Jenni made: "He is...Risen, Lord, Friend, Savior." Love it!  Her pot turned out gorgeous too, covered in fabric and finished off with a ribbon accent.
And me?  Well, I stamped some words on the eggs, then used my Martha Stewart dauber to add colored polka dots.  I like the way they look arranged in this basket I found.
And my pot?  Well...it speaks for itself, doesn't it?  Who saw that one coming?

What do you think?!  Do I have an amazingly talented and creative group of friends or what?  I just love these girls and I love having a time set aside each month for getting together to make fun things!  Which projects are your favorites?

Hugs & Glitter,


Pin It!

March 1, 2013

Fabric Covered Flowerpot

This year, I started something really exciting; an in-real-life crafting group!  We call ourselves the Crafty Ladies, and we meet one afternoon a month to have some creative girl time together.  We decide on a project, I purchase most of the supplies, and then they reimburse me when they show up to craft!  In January, we had our first meeting and created decorative wooden blocks.  We decided that the theme for February's event would be decorating flowerpots and wooden eggs for Spring.  

Before the ladies came over, I decided to try out a few techniques so I could help to inspire and teach them.
One of the experiments was Little Crafter's Paint Drip pot, which is so fun and easy!  The other idea I tried out was covering a pot with fabric and Mod Podge.  Here's the basic technique I used {and later shared with the girls}!


Materials:
- fabric {you can use all one fabric, or you can use two or more coordinating ones}
- pinking shears
- paintbrush or paint spatula
- terracotta pot
- Mod Podge: Fabric formula


Step 1: Cut your fabric into small squares {about 1 1/2"}.  
 Depending on the size of your pot, cut as many squares as you think you might need.  If you need to cut more later, you always can.


Step 2: Begin Mod Podging your squares onto the pot.  First apply Mod Podge directly to the pot.  Then, place your fabric on top of it.  
Make sure to cover the entire surface, as well as folding it down to cover the bottom and go over the rim of the top.

Step 3: Cover the entire surface of the pot with a nice coat of Fabric Mod Podge to seal it.  Let dry completely.

Step 4: Add a plant!  Once your pot is dry, you can plant anything you like in it.  I chose tulip bulbs.  Just a note: do your planting outside.  Otherwise you can end up with a dining room table and floor that are literally covered in dirt...or so I would think...not that I know or anything...{ahem, cough}.


Next week, I'll be sharing a post where you'll get to see how my friends' fabric covered flowerpots turned out.  All but one of the nine ladies decided to go with this technique {the other painted hers a pretty shade of green}.  I'll also show you the decorative eggs.  You're going to love what they created!

Hugs & Glitter,


Pin It!
Related Posts Plugin for WordPress, Blogger...
Pin It button on image hover