


Showing posts with label holiday crafts. Show all posts
Showing posts with label holiday crafts. Show all posts
June 25, 2013
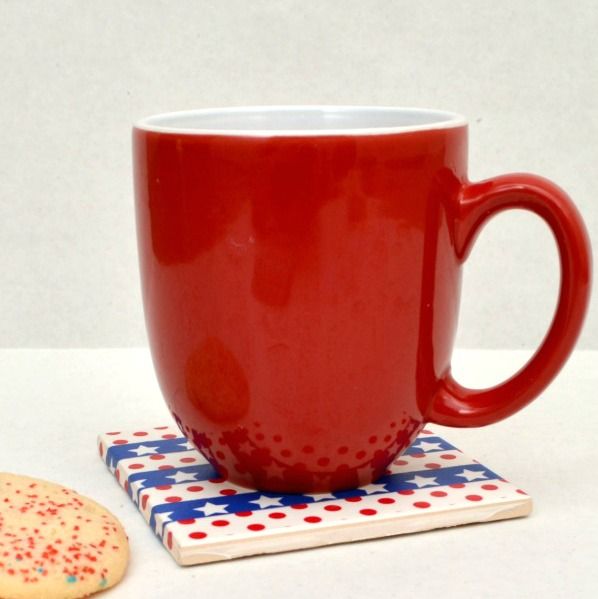
Patriotic Washi Tape Coasters

June 16, 2013
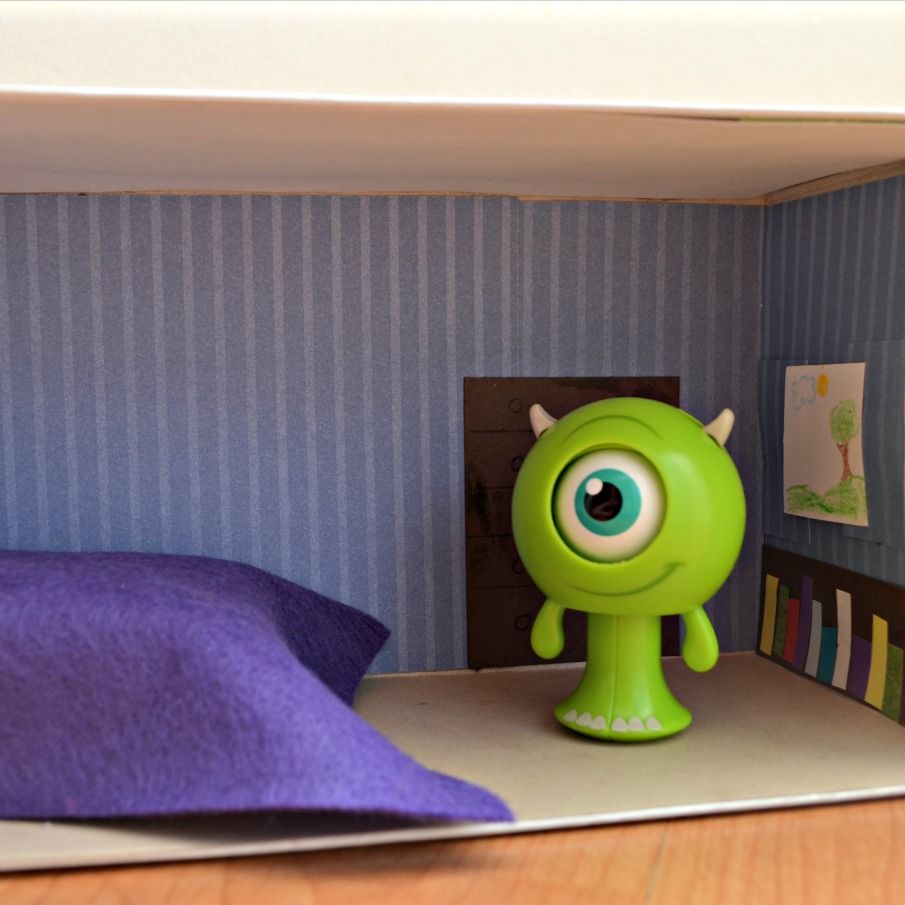
Happy Father's Day: A Photo Project
Happy Father's Day to all the dads out there who happen to read One Artsy Mama {all two of you!}.
Today is a special day to celebrate how important fathers are and what a special role they play in our lives. I want to give a shout-out to my dad, the source of my sense of humor, my germaphobia, and my love of ice cream, and thank him for always giving the best advice in the world! I love you, Dad! I also want to give props to my hubby, who is an amazing father to Little Crafter day in and day out. Dan, I truly hope that he grows up to be the same kind of honest, loving, man of integrity that you are!
You all know about the first gift I made for hubby {I also made the same thing for my dad using a different photo}, but today I wanted to show you the other project Little Crafter and I worked on together for him.
Here it is:

March 10, 2013
Stenciled Easter Treat Bags
Ready or not, friends, it's coming! Easter is just around the corner! Here in the Artsy House, Little Crafter has been begging to make some holiday crafts. In fact, if you noticed a huge deluge of pins on his Pinterest board a few days ago, let me assure you that they're really all hand-pinned by the little man! He made me type "Easter Crafts" in the search bar and then started clicking like crazy. True story.
Anyway, we didn't have everything we needed on hand to make any of the things he pinned and he decided it was too cold for a trip to the store, so I pulled out some canvas bags I had left from a project last year and let him go to town making these:

Materials:
- canvas bags
- cardstock or newspaper
- fabric paint
- sponge brushes or daubers
- stencils {ours are Martha Stewart}
Step 1: Place some cardstock or newspaper in your bag to prevent paint from going through to the other side.

Step 2: Use fabric paint and a sponge brush or dauber to apply paint to the bag using desired stencils.

That's really all there is to it. Just make sure you don't put your stencils or your hand down in wet paint, and you're good. Let it dry completely before filling the bag.

I have to say just for the record that I learned an important lesson while doing this project with Little Crafter. Gone are the days when I design a project and help him to execute it my way. No, friends, from now on, his projects are truly his projects. I had a design in mind, but he knew exactly what he wanted, and so I let him go for it. He came up with both of these designs 100% on his own. He chose the stencils, where they went, and what colors to use. Pretty good, huh? I guess starting him early paid off!

LC also did all the stenciling himself except that I helped with the "Happy Easter." I held the stencils in place and he did the paint work...which means I ended up with a lovely "crafter's manicure." Did you know fabric paint doesn't like to come off of skin? Yeah. Me neither.

I think they turned out just adorable, and he is beyond thrilled with them. It's cute to see how proud he is of his handiwork...he wants to show it to everyone, so he's beside himself with excitement that I put it here for, as he says "everyone in the whole wide world" to see.
They're the perfect size for filling with candy and treats or with plastic eggs, which is what's in ours at the moment. If you like them, I'd love for you to leave a little comment I can read to him...it would make his day!

Hugs & Glitter,

February 27, 2013
St. Patty's Day Ideas for Kids
Hey, friends! The next holiday on the horizon is St. Patrick's Day, so I thought I'd share a few of our projects from St. Patty's Days Past that you might have missed. This first one is actually the very first blog post I ever did here on One Artsy Mama, believe it or not! It was back when I had about six followers, and they were all members of my family. Safe to say, you probably never read it, so take a peek!


Hope you enjoy these little blasts from the past! LC sure did!
Hugs & Glitter,
February 19, 2013
Split Pea Kiss Me Sign

Materials:
- split peas
- wooden frame
- glue or Mod Podge
- printable and scissors

STEP 1: Spread glue/Mod Podge on the wooden frame and place peas on top. Let it dry completely!

Here it is, just waiting to dry. Our particular frame came with the jute hanger attached already and a 2" x 3" opening. You could, of course, use any size frame.

STEP 2: Print and cut your printable. This one is sized at 2 x 3" proportions. If you would like to use it, feel free; just right click and save the image to your computer...my St. Patty's gift to you!

STEP 3: Insert printable into frame and display!

Naturally, it didn't take the entire bag for our frame, so I had to come up with a use for the rest of the peas. I dumped them into this vase I got at Walmart for $2.99 and stuck a candle in it. The entire bag of peas was just $1.99 at the grocery store, so I got two projects for less than $5. Yup. Quick, cheap, and easy, just the way I like it.

I think the green is such a great color, and I love the natural look of the peas. Plus, when St. Patrick's Day is over, I can pull out the printable and exchange it for a spring themed one or a pic of Little Crafter.

Hugs & Glitter,

February 14, 2013
Tree of Love Canvas
Happy Valentine's Day, friends!! Wishing you a day filled with love and joy. In Artsy-Land, while we of course celebrate the love between my husband and myself, we also really focus on the love we have for each other as a family. We try to make it a special day for Little Crafter {he's particularly excited about presents and spaghetti for dinner}, and we also like involving him in creating gifts for Mommy and Daddy.
Here's a peek at the gift we worked together to make for hubby this year. I like how the tree kind of represents a family tree and that our love as a family is always growing.

Materials:
Canvas {mine is 12x16}
Adhesive vinyl
Silhouette Cameo and Silhouette Studio
Transfer Tape
Little helper {optional}
STEP 1: Download the free image from the Silhouette Online Store. It will only be free this week, so even if you think you may not use it until next year, go get it!
STEP 2: Cut the image. I cut the tree from brown vinyl, the words from light blue, and I divided up the hearts, cutting 5 from dark pink, 5 from light pink, and 6 from red.
STEP 3: Use transfer tape to place the tree image onto your canvas.
First you peel off the backing and place the sticky side of the transfer tape on top of your cut vinyl.

When you peel it up, your cut image

Then, line it up on your canvas and rub. When you pull the transfer tape up, the vinyl *should* be stuck to the canvas. This proved a bit tricky, as it wanted to come back up with the tape sometimes. I ended up helping it along with my fingernails a bit. LC was my expert rubber...such a helper.

STEP 4: Repeat process for the words.
Can you do this without the transfer tape and just use them like stickers? Of course. Is it impossible to get everything straight and lined up that way? Absolutely.

STEP 5: Stick hearts onto the branches wherever you {or your small helper} like!


I'm thrilled with how it turned out! I also got hubby something I know he wanted; a Tervis Tumbler {we're both addicted to them} that shows off our team pride! Woot!

And he, of course, gave me my present early...my Torrey Smith SuperBowl jersey!! Since I'm allergic to flowers, make my own jewelry, and don't eat candy {I save my calories for Starbucks and Edy's ice cream}, it was the perfect choice!

Hope you have a very Happy Valentine's Day! Love and hugs from the Artsy Family!

February 13, 2013
Valentine Blocks Kid-Style
Friends, I have something so super-duper special to show you today...that is, if I can get through it without melting into a big Mommy-puddle first.
Remember the Valentine blocks my crafting group made a few weekends ago? Well, what I didn't tell you in that post was that Little Crafter was mad at me. He was furious that he had to go to bed while we were making a craft. He was quite insistent that he needed to make a block too. So, while I insisted on a proper bedtime that night, a few days later, I let him have his choice of blocks and told him he could make them say whatever he wanted. At first, he chose just one small block. Then, our conversation went something like this.
Me: "Do you want to make it for Valentine's Day?"
LC: "Yef." {his way of saying yes}
Me: "What do you want it to say?"
LC: {thinking for a moment} "I love you, Mommy. To the moon and back infinity times."
Me: {I melt} "Aw, thank you, buddy! I don't think that will all fit on your block though."
LC: "Then I need more blocks."

And so, he painted three. Three sweet and beautiful blocks I will cherish always. Here's how he did it.
Materials:
wooden blocks {ours were 2x4's cut into 6" pieces
acrylic paints
adhesive vinyl
Silhouette Cameo {although you could cut by hand}
STEP 1: Paint your blocks.
Two of these already had a base coat of light pink. I had painted them during Crafting Night but couldn't decide what to do with them. Little Crafter took it from there, using the finger painting technique he perfected on his photo frame the day before. He loved mixing the various shades of red and pink and trying to create "peppermints" on the first two. When he got to the third block, he started mixing all the colors and just painting with his entire hand.

STEP 2: Cut out your design.
Ok, this is the part where those of you who emailed me after I got "Cammie" and told me you have a Silhouette Cameo sitting unopened in your house somewhere should get a kick in the pants. Look at this. Little Crafter is literally using the Silhouette Studio software and typing in his words.

I helped him to sound them out and spell them correctly {it was actually good practice for him!}. Then, we clicked "Send" and Cammie cut the adhesive vinyl for him.

I let him choose his colors for each set of words, and he picked purple, "green", and blue. Everything cut perfectly. He's four, friends. You. Can. Do. This.
STEP 3: Adhere your letters onto the blocks.
We used blue painter's tape to help us keep the letters straight. LC helped push them down so they were stuck really well.

STEP 4: Make someone's day.
I told him {several times} that this is probably THE sweetest gift anyone has ever made for me. He had such fun making it and the sentiment was straight from his own little heart. It's the kind of thing you cherish forever. I'll be putting it out every Valentine's Day, even when he's fifteen and says, "Moooom, put that baby stuff away!" And even when he's fifty. Sigh. My baby.

What's your most treasured gift?
Hugs & Glitter,

February 12, 2013
Love Note Pocket Hearts
Hi, friends! Today, I want to introduce you to a guest blogger who's joining us all the way from Australia. Her name is Clare and she blogs at Clare's Craftroom. She shared this adorable project with me and I thought you might like to see and make it too...enjoy!
LOVE NOTE POCKET HEARTS

Hello and good morning to you all! I am so happy to be here guest posting at
One Artsy Mama .
Although we are not big on Valentine's Day
here in Australia I do love hearts! These little ones are so quick and easy to
make in any size and they have a little pocket for your love
notes so you can send messages any time you like. They also might be cute for popping in your
little one's lunch box with a sweet note from Mum.

The ones here are only about 2" but
you decide how big you would like yours and trace your heart
shape onto cardboard. There are 3 pieces of fabric ~ front , back
and pocket. The pocket piece has the top edge pressed
down before sandwiching between between the front and
back pieces. Trace your heart shape on.
Stitch around leaving a gap for turning.

Cut out heart shape and clip and snip.

Turn right side out and stuff very lightly. Neatly stitch the gap closed.

Pop a little note in the pocket.

These should take you 10 minutes to make
tops. So you can make a pile of them and everyone
will know
you are just lovely !

As I don't do Valentines, I give a donation
each year to the Heart Foundation and this makes my
heart feel really good.
**************************************************
Thanks so much, Clare, for sharing your heart project with us today! I have to confess, this project was so cute, I couldn't resist giving it a try! Here's how my first attempt turned out! Eep, aren't they adorable?!

Hugs & Glitter,

Subscribe to:
Posts (Atom)