








Showing posts with label jewelry. Show all posts
Showing posts with label jewelry. Show all posts
July 2, 2013

June 28, 2013
Wire Crochet Bracelet: Brianna
Hey, friends! Remember Brianna, the second place winner from this year's One Crafty Contest? She knows how to make a super-cool kind of jewelry I had never tried, so today she's here to share it with all of us...enjoy!
Hello! I'm Brianna, and I blog over at CraftandRepeat.
***********************************************************************
Hello! I'm Brianna, and I blog over at CraftandRepeat.


June 26, 2013
Boho Beaded Bracelet
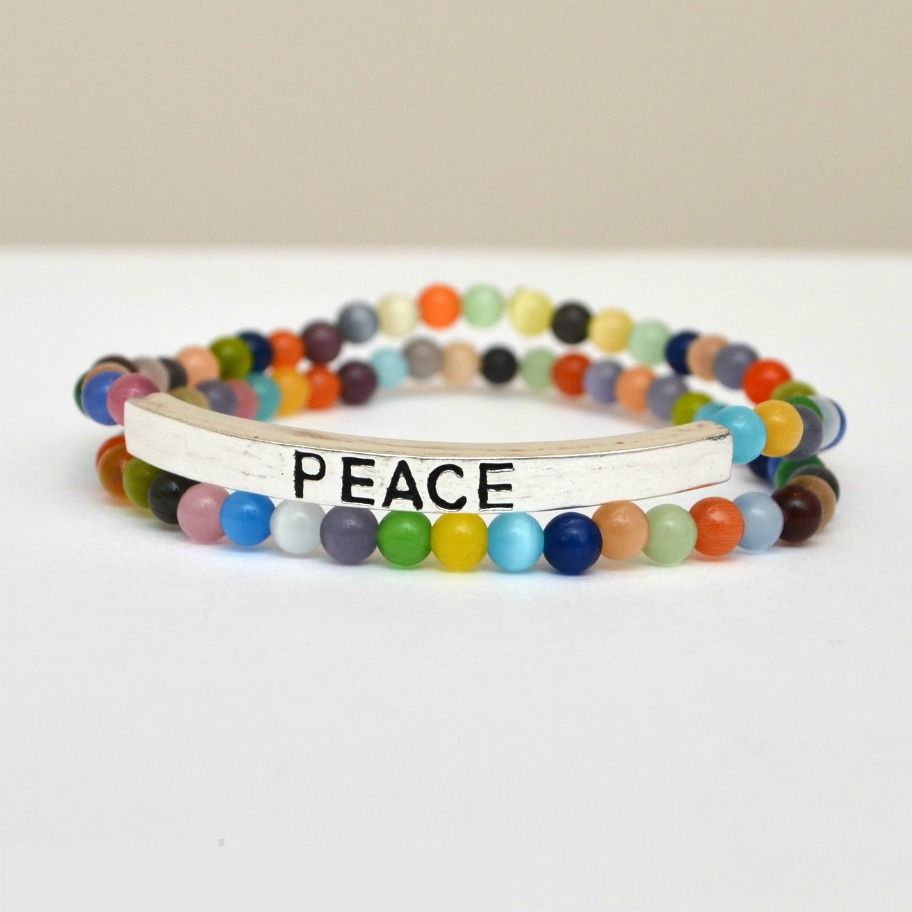
I don't know about you, friends, but my summer wardrobe consists of a variety of different colors. I've got some coral, some yellow, lots of turquoise, some pink, various shades of blue, and even some black and white. So, I decided to make myself a bracelet that would match just about anything so that I can grab it and go, knowing it will look great no matter what I'm wearing for the day. In the end, it actually ended up being two bracelets that I can either wear individually or stacked. Here's how I made them, and you can too!

June 21, 2013
Styled by Tori Spelling Jewelry: Easy as 1-2-3!

Who loves jewelry? You all know I sure do! And even more fun than buying it is making it yourself! I'm constantly getting comments from readers who are interested in making their own bling, but don't know where to start or are intimidated by the tools and techniques. Honestly, it's not nearly as difficult as it seems. And today, I've got an extra-special treat for you, especially all the novices out there who have been afraid to try your hand at it...I'm going to show you a great way to start that requires NO tools and NO special skills. It's literally as easy as 1-2-3.
Ready?
It's called the Styled by Tori Spelling jewelry line, and you can get it at exclusively at JoAnn Fabric and Craft Stores. I recently got to sample a bunch of the pieces from Tori's new line {yes, I have the best job in the world!} and I couldn't believe how simple it was to create amazing statement pieces in thirty seconds or less.
Here's how it works. We're going to start by making a necklace.
You need three pieces:
1. A chain
2. A necklace bottom
3. Connectors

June 20, 2013


June 12, 2013
Treasures of the Ocean Jewelry Set
Hey, friends! You know how much I love the beach, and as much as I thoroughly enjoyed our recent vacation, I'm kind of bummed that it's already over for this year. So, when I saw these gorgeous green shell beads that remind me of the ocean, I thought I'd make myself a jewelry set that will make me think of my favorite place all summer long, even when I'm not there.

June 7, 2013
Braided Anchor Bracelet
Hey there, friends! Now that Memorial Day is past and we can officially start thinking "summer," I thought it was time to break out some nautical and beachy themed projects to throw in the mix! I ordered a fabulous anchor button awhile back just because I loved it, but I had no idea how to actually use it for anything. I played around a bit, and here's what I came up with! Take a look...
Braided Anchor Bracelet

May 31, 2013
Scrabble Tile Necklaces and More!
Each month, I look forward to getting together with some of my in-person crafty friends and making a project together! I started organizing our "Crafty Ladies" group at the beginning of this year, and we've made some really fun things, like our Decorative Wooden Blocks, Fabric Covered Flowerpots, and Wooden Eggs. This month, due to Mother's Day and Memorial Day and vacations, only four of us were able to get together, but we had a great time making Scrabble Tile Necklaces plus some beaded jewelry.
Scrabble Tile Necklaces are one of the easiest jewelry projects to create! Here's what you need:

May 15, 2013
Painted Wooden Bangles
Hey there, friends! In honor of the Paint Round of One Crafty Contest, I thought I'd spend some time this week showing you some paint-y inspiration! Starting with these:

May 9, 2013
Amethyst Memory Wire Bracelet
Friends, if you've been paying attention to sports news recently, you'll know that the NFL draft just happened. My Baltimore Ravens had a few important picks, and we're on the way to building another championship team this year! Of course, I'll need to be ready to wear my purple when preseason starts in a few months, so when Wholeport.com sent me these amethyst beads to play with, I didn't waste any time making a pretty memory wire bracelet with them!

May 2, 2013
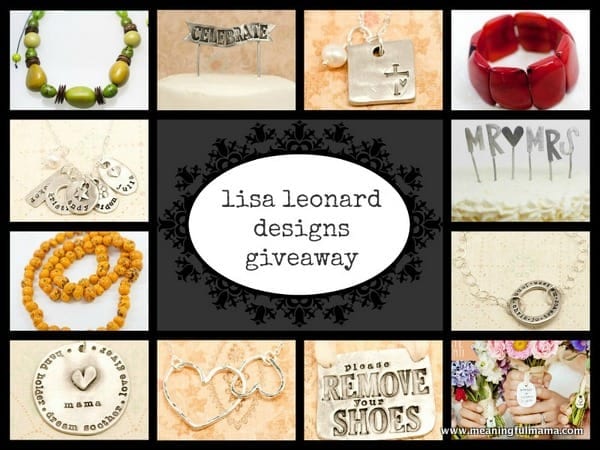
Lisa Leonard Designs Giveaway!
Hey, friends! I know you all looooove a good giveaway, so I absolutely jumped on the opportunity when it came my way to partner up with a few other gals and offer you one from Lisa Leonard Designs!
May 1, 2013
Half Beaded Bracelet
Hi there, friends! Today I wanted to share one of my most recent jewelry projects with you! If you follow my buddy Meredith at Wait 'Til Your Father Gets Home, you may have seen this already because I guest posted on her blog while she was at SNAP! {lucky girl!} But, for those of you who might have missed it, here it is:

April 25, 2013
Dangle Shell Earrings
You all know that one of my favorite colors this season is coral! But, a close second is royal blue. It's so deep and gorgeous, and will transition really well into summer too with its nautical feel. I have a few favorite blue pieces in my spring and summer wardrobe, but I didn't have a pair of earrings that I loved to go with them. So, what's an artsy mama to do? Make some, of course!

Here's how I did it, and you can too! Wholeport.com provided me with the beads; here's everything I used:
April 17, 2013
Origami Owl: Living Locket Giveaway

Friends, I have a very special treat for you today! Lately, I've had a number of opportunities to review {and give away} lots of different and fabulous products. Today I have one more for you, and I have to confess that it just might be my favorite one yet.

April 10, 2013
Colorblocked Earrings
Hey, friends! As I was doing some clean-up work on the blog recently, I came across an old guest post I did for someone else's blog back when One Artsy Mama was very new, and it occurred to me that many of you probably never saw this project. I absolutely love these earrings, and color blocking is still a huge fashion trend for this Spring {I was ahead of my time!}, so I thought I'd re-share them with you today! My apologies in advance for the crummy photos...it was before I had my new camera equipment and before I knew much about editing too...
They're really simple, so even if you've never ever made jewelry before, you can do it! Ready? Here they are!

I decided to make them a combination of magenta, orange, and yellow so that they'll really stand out with a black/neutral outfit or match anything that has one of those colors in it. You can make them with any color beads you like. Here's how to do it:
April 8, 2013
Layered Button Necklace

Hi, friends! Today I have a fun and super-simple project for you! You only need two buttons, and it will take about five minutes to make this stylish statement necklace! Mine features one of my all-time favorite buttons, the "Carlos," but you could use any two buttons you like, as long as their sizes and colors compliment each other! Here's how I did it and you can too!
April 2, 2013
Jewelry Giveaway: Kidz Can Design
Some of the most precious pieces of art on the planet are those made by the smallest artists, aren't they?
I treasure the things Little Crafter makes, but sometimes I run out of ways to display them. Recently, I was introduced to a company called Kidz Can Design, and I know you guys are going to love their idea as much as I do. Get this...they take kids' artwork and turn it into jewelry! For real!
Here's how it works.
You all know LC is constantly creating awesome things, but I have a soft spot for this little smiling heart...


You can choose from a pendant and a charm, and chains/bracelets are also available. All of the pieces are made from 925 Sterling Silver.
Oh, and if your child is too small to create a work of art, you can use a handprint or footprint instead! Take a look at this example!


I treasure the things Little Crafter makes, but sometimes I run out of ways to display them. Recently, I was introduced to a company called Kidz Can Design, and I know you guys are going to love their idea as much as I do. Get this...they take kids' artwork and turn it into jewelry! For real!
Here's how it works.
Your child {or friend or grandchild or niece or nephew} draws/paints something fabulous.
You all know LC is constantly creating awesome things, but I have a soft spot for this little smiling heart...

You scan said masterpiece, or take a photo of it. Then, you visit the website where you can upload the image.If you prefer, you can also mail in a physical copy of the drawing.

You wait {about 2 weeks, according to the website}, then receive a sterling silver replica you can wear and treasure!Here's how Little Crafter's masterpiece turned out! He was enthralled with it, and he gets so excited every time I wear it.

You can choose from a pendant and a charm, and chains/bracelets are also available. All of the pieces are made from 925 Sterling Silver.
Oh, and if your child is too small to create a work of art, you can use a handprint or footprint instead! Take a look at this example!
Here are a few other pics of finished pieces:
Seriously, how fun is that?! I'm just amazed by what they can do...I feel like I need a bracelet I can add a bunch of charms to each time LC makes something new! I honestly love the finished product; I think it's a great quality and I'm a total sentimental sucker, so having his actual artwork in wearable form just makes me melt. My only complaint about my experience was that it took a month between the time I submitted LC's picture and when I received the finished piece, due to the fact that they had a large volume of orders and I wasn't high priority since it was a review piece rather than a paid one. I'm not going to lie, I was totally bummed that it took so long {and I may or may not have been stalking the mailman every day}, but it's so cute, it did turn out to be worth the wait. I actually have another drawing he just made of himself and me that I'm thinking of having made into a charm. I think these would make great Mother's Day gifts for moms, grandmas, aunts, and pretty much anyone in your life...just be sure to order early so you have it in plenty of time!
Anyway, here's the best news for you:
Kidz Can Design is offering one reader a FREE piece of jewelry!
Rafflecopter will walk you through the entry process; good luck, friends!
a Rafflecopter giveaway
Hugs & Glitter,
Disclosure: I received a free necklace for the purpose of writing an honest review of my experience with KidzCanDesign.com. All opinions presented in this post are my own.
March 30, 2013
Spring Bling Week Giveaway Packages!
This week, I had a great time participating in Spring Bling Week!
After all, a girl can never have too much bling!
After all, a girl can never have too much bling!
Have you seen all the fabulous pieces we've shared this week?
 Bingo Marker Spoon Pendant by Holly from 504 Main / Beaded Wire Earrings by Kate from Cheap Craft Mama / Mixed Media Bracelet by Adrianne from Happy Hour Projects / Color Block Earrings by Kara from Happy Go Lucky / Pearl Cluster Earrings by Kara from Happy Go Lucky / Stamped Washer Necklace by Adrianne from Happy Hour Projects / Woven Ankle Bracelet by Adrianne from Happy Hour Projects / Handstamped Ring by Amy from One Artsy Mama / Amber Dangle Necklace by Rebecca from My Girlish Whims / Druzy-Style Resin Necklace by Adrianne from Hour Hour Projects / Simple Statement Necklace by Natalie from North Shore Days
Now for the best part.
We are giving away 4 different prize packages!! This is going to be so much fun! I love when we can pick multiple winners.
Just use the rafflecopter below and you'll be entered to win one of the following 4 prize packages.
We are giving away 4 different prize packages!! This is going to be so much fun! I love when we can pick multiple winners.
Just use the rafflecopter below and you'll be entered to win one of the following 4 prize packages.


The winner of prize package will receive a bird nest necklace by TLC Creations, $25 shop credit to Bangle Wood Crafts, and photo bracelet kit from Photo Jewelry Making

The winner of prize package #4 will receive a $50 Shop Credit to Lisa Leonards Designs

March 28, 2013
Handstamped Ring

Friends, I am so excited to be a part of "Spring Bling Week"! Some of my favorite blogger friends who also make jewelry have teamed up to bring you a week full of tutorials, which will wrap up with four great giveaways! Today, it's my turn to share a tutorial with you...here goes:

Do you remember the great giveaway my friend Blythe from Desperate Craftwives sponsored for us at a Shine on Fridays party a few months ago? She was giving away gorgeous handstamped rings, and she was sweet enough to send me one too! I fell in love with it immediately and have worn it every. single. day. since it arrived, so when I saw a pack of flat ring blanks in Michaels, I couldn't resist picking it up and trying to make a few myself...I'm thinking they'll make great gifts! If you're so inspired, here's how you can try it too:
Materials
- steel stamping block
- alphabet stamp set
- hammer
- painters' tape
- ring mandrel
- ring blanks
- permanent black marker
- silver jewelry polishing cloth

Before you begin, determine what word or phrase you want to stamp on your ring. I chose, "oh how he loves us," which is a line from one of my all-time favorite songs by the David Crowder Band. Write it out on a piece of paper and find the center.
STEP 1: Tape your blank to the steel block on top of a hard, flat, and stable surface. Make sure the tape is straight because you'll be using it as a guide for your letters.

STEP 2: Stamp your letters. To do this, I mark a line on the tape for the center. I begin with the center letter, then work outward in both directions. Place your stamp where you want each letter to be and give it a very firm tap with your hammer.

This is how your ring will look when the stamping is complete. You can choose to leave it this way, or you can darken the letters for an oxidized look.

STEP 3: To get an oxidized look, the easiest trick is to color over your letters with a black permanent marker. Yes, this will eventually wear off, but the good news is that you can retouch it anytime by repeating this process and coloring them in again.

STEP 4: Use a polishing cloth to rub off the excess marker. All that remains will be the marker in the crevices of each letter.

STEP 5: Form ring shape by wrapping blank around a steel mandrel. You'll need to use your hammer to tap down the ends.

The great thing is that these rings are adjustable, so you can give them to friends knowing that they won't be too small, unlike a wire wrapped ring.

I want to try some of the thinner blanks too, now that I know how well the DIY process works, but I like how I can fit two lines of text on these which allows for longer phrases like this one.

What about you? Do you think you'll try your hand at ring making? What would you stamp on yours?

Be sure to visit my friends and check out the fabulous jewelry tutorials they've been sharing all week long!


Woven Ankle Bracelet by Adrianne, Color Block Earrings by Kara, DIY Amber & Gold Dangle Necklace,Simple Statement Necklace by Natalie, Mixed Media Bracelet by Adrianne, Bingo Marker Spoon Pendant by Holly, Dangle Earrings by Kate
Hugs & Glitter,

Subscribe to:
Posts (Atom)
