One Artsy Mama One Artsy Mama One Artsy Mama One Artsy Mama blog lovin'
Showing posts with label recipes. Show all posts

June 6, 2013

Patriotic Chocolate Nonpareils: Emily at The Benson Street

Hey, friends!  Today I'm excited to have a new bloggy friend of mine here to share a fun recipe with you that would be perfect for the 4th of July and any other patriotic parties you have planned this summer!  Here she is; you're going to love her...
****************************************************

Hey One Artsy Mama Readers!! I'm Emily and I blog over at The Benson Street about recipes, crafts and printables (I love printables!!). I love Amy and her blog and can't wait to share an easy, yummy project with you today.

  Emily
Benson at The Benson Street 

 Have you ever had chocolate nonpareils??? If you haven't they are the cutest looking chocolates. Chocolate Nonpareils are chocolates dressed up with sprinkles (nonpareils to be technical). These easy candies are sure to impress!
  Patriotic
Chocolate Nonpareils 

Pin It!

May 29, 2013

Easy, Healthy{ish} Chicken Vegetable Alfredo

Friends, you all know I'm no gourmet chef.  As much as I love to eat, I leave the recipes to professional chefs in the family {my brothers-in-law}.  You've probably noticed that it's a very rare thing to find a recipe here at One Artsy Mama.  BUT.  Today I wanted to share with you something I recently discovered.  It was one of those rare instances when we weren't all eating dinner together as a family, so for once I got to experiment with something cheesy that my lactose intolerant hubby can't eat.  It's  oh-so-delicious, and you know if I made it, it has to be quick and easy, right?  So, here's my super simple, somewhat-healthy new favorite meal!  

CHICKEN VEGETABLE ALFREDO
Pin It!

May 22, 2013

Planning Meals with Martin's {and free recipe card printables}!


Hey, friends!  Today, let's talk about food!  More specifically, dinner.  I don't know about you, but I love to eat and so do the men in my family.  Every day, we eat dinner together as a family and I try to plan ahead for great meals we can all enjoy.  But sometimes I feel like we're stuck in a rut.  Particularly when Little Crafter gets involved in making the menu.  If it were up to him, every week would look the same: Spaghetti, tacos, BBQ, leftover spaghetti, leftover BBQ, pizza...or some combination thereof.  It's a challenge to find recipes hubby can eat, though, since he's lactose intolerant and can't have cream, milk, or cheese.  

Pin It!

May 16, 2013

Spicy Mexican Fudge: Wine & Glue


Hi there One Artsy Mama Fans!  I'm Lisa and I blog over at Wine & Glue.  Recently I was ogling over all of Amy's craftiness and bemoaning my own lack of craft (my tagline is that I'm a wannabe crafty mom, and I do a really good job living up to that).  So Amy was kind enough to treat my readers to a fun and easy jewelry craft, and I'm here to share with you one of my more popular desserts, Spicy Mexican Fudge!  It's super easy and has a big wow factor.
Pin It!

January 21, 2013

Garlic Chicken

Friends, you know cooking and recipes are not my forté, but as I was making dinner the other night, it occurred to me that I could share with you the recipe for one of our favorite main dishes: Garlic Chicken.


I actually got this recipe from my good friend Robin about five years ago.  I was pregnant with Little Crafter, and she came over one day to help me make a whole bunch of freezer meals so that in the weeks after he was born, when people stopped bringing us meals, I could just pull things out of the freezer and heat them up.  This was one of the things she taught me to make, and boy is our family grateful!  

Now, you know that if I'm sharing a recipe, it must be easy with not too many ingredients, pretty quick, and lactose-free...this fits the bill on all three counts.  Here's what you need:


- 1/3 cup butter {or apparently, "not butter"}
- 2 garlic cloves, minced
- 1 tsp garlic powder
- 1/4 tsp salt {oops, left that out of the photo}
- seasoned bread crumbs
- boneless, skinless chicken breasts {we often use Perdue Perfect Portions}

It's extra fun if you have colorful measuring spoons like these that I got for Christmas, but totally not necessary. ;)  Oh, and can you see my cute little Cammie-made sugar canister sneaking into the pic?
Anyway...

STEP 1: Melt 1/3 cup butter in a small saucepan.

STEP 2: {while butter is melting} Combine minced garlic, garlic powder, and salt in a small bowl.

STEP 3: Add melted butter and stir.

STEP 4: Dip each chicken breast into the butter/garlic mixture, thoroughly coating it, then into a bowl of seasoned bread crumbs.


STEP 5: Place on a foil-lined baking sheet and bake for 17 minutes at 350 degrees Farenheit.
*Note - that temperature and time is for the Perfect Portions, which are thinner than some chicken breasts you can buy.  If you have thicker ones, it may take 30-35 minutes.  Use the package instructions to determine cooking time!*


All done!  


ENJOY!  We usually pair ours with either white rice or orzo, which I season with butter, salt, and fresh rosemary and lavender.


 And, because I know you're wondering, yes this is my for-real dinner plate.  Yes, I ate it all.  Plus seconds on the yummy orzo.  We're not into fake food photo shoots around here, this is the real deal.  Which means I got that, "What on earth are you doing taking a picture of your dinner?!" look from hubby.  C'est la vie when you're a blogger!

Anyway, this recipe is seriously delicious and pretty darn easy too.  I'd love to know what you think if you give it a try!

Hugs & Glitter {and apparently garlic too}!


Pin It!

December 20, 2012

Totally Irresistable English Toffee

Calling all Toffee Lovers!  And chocolate lovers!  And candy lovers! 
Boy, oh boy, do I have a real treat for you today!  This recipe is going to make your taste buds do cartwheels and your hips say, "oh, nooooo!"


A few disclaimers first, in the spirit of full disclosure...

#1: I got this recipe from a friend of ours at church who had made this tasty treat for us to enjoy while making our advent boxes.  She actually has a blog of her own where she posts some of her most favorite recipes, which you can see here.

#2: You know I'm not much of a chef, so it may not surprise you that I was not the maker of the toffee you see in the following photos...my wonderful mama was.  Those are her hands you'll see doing all the hard work.  My contributions consisted of photographing, occasionally holding the candy thermometer, and quality testing the end result.

Whew, I feel better now.  On to the recipe!

English Toffee
1 cup sugar
1 cup butter
1/4 cup water
1 pkg milk chocolate chips

STEP 1: Mix together sugar, butter, and water in saucepan.

STEP 2: Stir constantly until temperature reaches 300 degrees Farenheit.
I took these photos to show the process...at first it just looks like melted butter.  Then it starts to bubble.  Once the boiling starts, it takes about 4-5 minutes to reach 300 on the candy thermometer.  As it heats up, it will thicken and begin changing color to become more brown.  {Funny side note - when Pinwheel first told my mom how to make it, Mom mistakenly thought she said it took 45 minutes instead of four TO five...lol.  She was pleasantly surprised not to have to actually stir that long!}

STEP 3: Spread mixture about 1/4 inch thick onto a cookie sheet lined with parchment paper.  Make sure you work quickly and do it on a heat resistant surface.


STEP 4: Allow toffee to cool for 3-4 minutes, then sprinkle with chocolate chips.


STEP 5: As chips melt, spread them out evenly.


STEP 6: Refrigerate for about an hour.  This is how it will look when it's ready.
At this point, my dad walked by and asked me why in the world I was taking a picture of that.  I told him it was for the blog, to which he replied, "so people can say, oh, what a nice cow patty?" 


STEP 6: Break into bite size pieces.
This is a great job for little helpers who can't be involved in the actual making of the candy since everything gets so hot!


STEP 7: EAT!  And eat and eat and eat and eat some more!


Thanks to Pinwheel for the delicious recipe, to my mom for being wonderful and making it, and to Little Crafter for breaking it up so nicely.  And to dad too, who let me come over and photograph these "cow patties" for you.

What's your favorite holiday treat?
Hugs, Glitter, and Holiday Cheer!

Pin It!

December 5, 2012

Sugared Mocha Cookies


If you visit One Artsy Mama on any somewhat regular basis, you know that cooking is not exactly my thing.  But I have to say, I have already made three recipes out of the Taste of Home Holiday Editions!  I think that's some kind of record for me and a cookbook...  I tried the Buffet Meatballs {which hubby and the members of our small group at church heartily approved of} and you may remember the Crispy Peanut Butter Balls {which just about every single person in my life approves of}.  Here's the third of my recipe attempts:
 
 
{Note: The actual title of these in the magazine is Scalloped Mocha Cookies, found on p. 16 of the Cookies & Candies edition.  I, of course, didn't have the scalloped cookie cutter, so we went for some different shapes instead.}
 
Ingredients:
2/3 cup butter, softened
1 cup sugar
1 egg
2 oz unsweetened chocolate, melted and cooled
1/2 tsp vanilla extract
1 3/4 cups all-purpose flour
1 tablespoon instant coffee granules
1/4 tsp ground cinnamon
1/4 tsp salt
Coarse sugar or edible glitter
 
1. In a small bowl, cream butter and sugar until light and fluffy.  Beat in the egg, chocolate, and vanilla.  Combine the flour, coffee granules, cinnamon and salt; gradually add to creamed mixture.
 
2. Shape dough into a disk; wrap in plastic wrap. Refrigerate for 1 hour or until easy to handle.
 
3. On a floured surface, roll out the dough to 1/4-in. thickness.  Cut with cookie cutters and place on ungreased baking sheets {I used parchment paper}.  Sprinkle with coarse sugar or edible glitter.
 
4. Bake at 350 F for 8-9 minutes or until set.  Remove to wire racks.


So, I had to test these out for quality-assurance, and here's my verdict.  If you don't like coffee, you will not like these cookies.  If you're like me and the Starbucks baristas know your name, order, and birthday, you'll love them.  They're not super-sweet, but they're tasty with coffee or an iced chai {just sayin...}.  I like how unique they are, and how much they remind me of a few of my favorite things...Coffee and Chocolate!  Maybe I should share some as Christmas gifts for those hardworking baristas I mentioned...
 
Now, I hope you'll check out some other fabulous cookie recipes to try this holiday season from some very talented bloggy friends of mine!

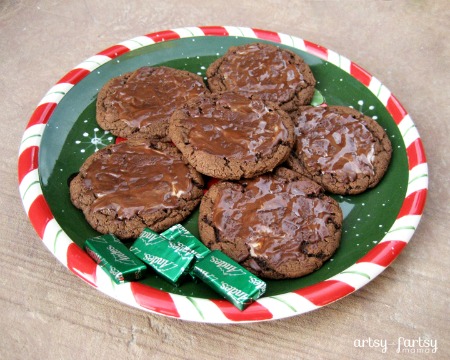
Andes Mint Cookies from Artsy Fartsy Mama

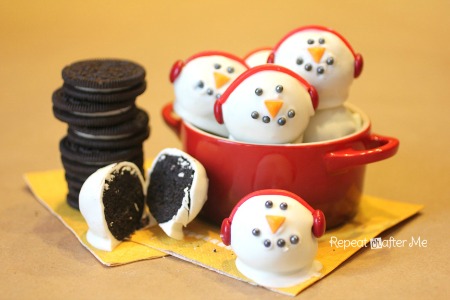
Snowman Oreo Truffles from Repeat Crafter Me

{How cute are these?!}

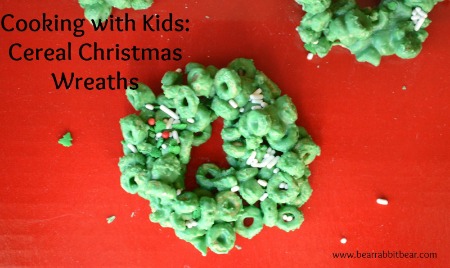
Cereal Wreaths from Bear Rabbit Bear

Christmas Mice from Happy Hour Projects

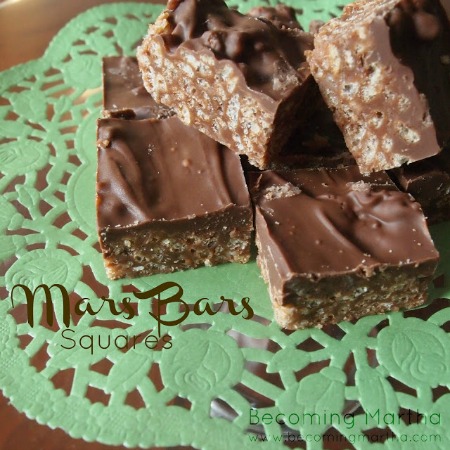
Mars Bars Squares from Becoming Martha

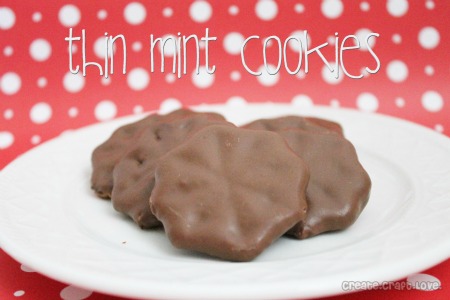
Thin Mint Cookies from Create.Craft.Love

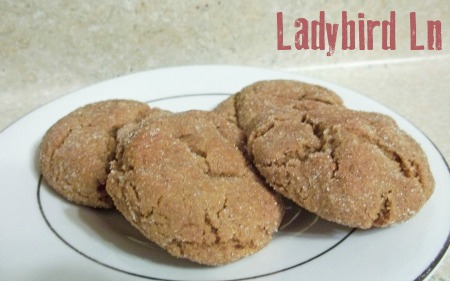
Soft Gingersnaps w/Pumpkin Dipping Sauce from Ladybird Ln

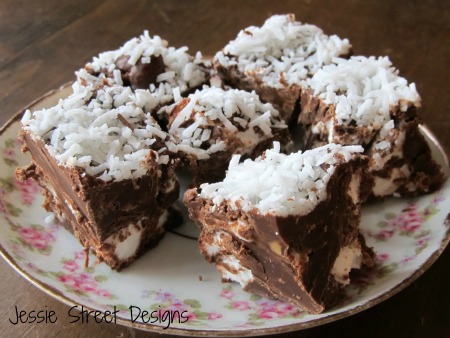
Marshmallow Chocolate Squares from Jessie Street Designs

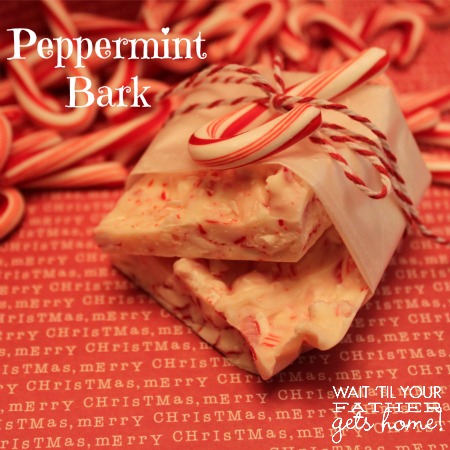
Peppermint Bark from Wait 'Til Your Father Gets Home

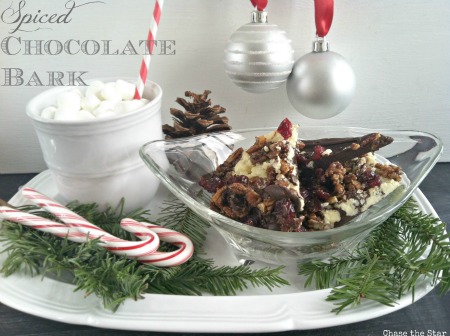
Spiced Chocolate Bark from Chase the Star

 
What's your go-to holiday cookie recipe?

 
Happy Crafting!

*Recipe reprinted with permission from Taste of Home magazine.


Pin It!

November 6, 2012

Taste of Home: Holiday Editions Giveaway

Friends, do I ever have some exciting news for you today!  Not only do I have a delicious recipe to share, I also get to give 10 magazines away to 5 lucky readers!  It all started a few weeks ago when Little Crafter and I opened the door to find a surprise package waiting for us that contained two Taste of Home magazines!  We got a copy of the Best Holiday Recipe edition as well as the Candy and Cookies one!  Needless to say, it didn't take us long to flip through and find plenty of things we wanted to try.
 
Now, you all know that cooking isn't really my thing, right?  I'm no gourmet chef, but we did manage to find plenty of recipes that weren't too complicated and also didn't contain lactose, so even hubby can enjoy them!  Here's the first one we tried, and let me just say that they taste even better than they look...
 
CRISPY PEANUT BUTTER BALLS
 
Here's the recipe, as found in the Best Holiday Recipes edition.


Here's a look at how we made ours:
First, we gathered our ingredients.  I found that generic crispy rice works just fine, but I'd never skimp on the peanut butter!  Get the good stuff.  
 
Before we started mixing, I had Little Crafter use a rolling pin to crush up the rice cereal...a trick I learned from my grandmother, who loves adding this to all kinds of cookie and candy mixes.  She says the texture is better if you crush them up, and I'm not going to argue!


My little sous chef helped me to mix the peanut butter, butter, sugar, and cereal together in the bowl.  At first, he stirred it with a spatula...

 
But eventually, we just had to get our hands in there and finish the job!  If you're wondering about the glove, it's because this child hates...I mean hates...to get his hands messy.  Giving him gloves was the only way I could get him to do this part, which I knew he'd love! 

I rolled the dough into balls, handed them to LC, and he put them on the trays, which then went in the fridge while we ran a few errands.
 
All that was left was the chocolate coating {the best part}!  Mmmmm!
 
Don't they look delicious?!  Let me assure you, they are out of this world! 
 
 
How do I know?  Well, that one poor candy had to get cut for photography's sake...I couldn't just put it back in with the others, now, could I?  And I couldn't just try the milk chocolate, the dark needed to be sampled too...otherwise how could I justify giving them to other people?  It's only right to quality test...
 
As for LC, the one thing he hates more than messy hands is chocolate {yeah, I have no idea how that happened}, so we made him the white chocolate version.
 
These were an absolute hit in our house!  I definitely plan on making lots more over the holidays to share with our friends and family.  I already came up with a cute way to package them, which I'll be sharing on the 14th, so be sure to stop by and see what it is.  In the meantime, we also have our eye on a few other recipes in the magazines, like the Mint Truffles and Mocha Cookies, and hubby has requested to try the meatballs found in the appetizer section.
 
Want to try some of these delicious recipes for yourself?  Here's the best part! 
Taste of Home is letting me give FIVE lucky readers TWO magazines each! 
Each winner will receive one copy of the Best Holiday Recipes edition plus one copy of the Candy and Cookies edition!  Rafflecopter will walk you through the entry process below; good luck, and Happy Eating!


a Rafflecopter giveaway
Pin It!

September 12, 2012

NKOTB: Nici

Are you all enjoying meeting all these great new bloggers?  Today's featured "new kid" is Nici from Posed Perfection; Í hope you'll make her feel welcome!  She has a yummy fall recipe to share.


Hi there!
I'm so excited to be guest posting here at One Artsy Mama during Amy's "New Kids on the Blog" series.  I'm Nici Higby and you can find me over at Posed Perfection.
I am married to Mr. Perfect for Me and I am a homeschooling mom to two great kids. At Posed Perfection, I share simple, delicious recipes, easy-to-duplicate craft projects, household tips and whatever is on my heart for the day.  I hope you'll stop by for a visit soon!

It's Apple-Picking Season in most parts of the country. There are hints of fall everywhere...the cooler evening temperatures, the gorgeous autumn decor in every store, and the beginnings of changing leaves.  I love this time of year!

To go with all those apples you bring home from the pick-your-own orchards, here is a super easy
Autumn Apple Brickle Dip.


Here's what you need:
cream cheese, brown sugar, white sugar, vanilla, brickle or toffee bits


Here's how you make it:
Put cream cheese, sugars and vanilla in mixer and beat just until combined.


Stir in toffee or brickle chips and mix. Put in serving bowl and chill for 1 hour before serving.


Autumn Apple Brickle Dip

1 (8 oz) package cream cheese, softened
1/2 cup packed brown sugar
1/4 cup sugar
1 tsp. vanilla
1 package brickle chips or toffee bits. (7.5 oz)

Beat cream cheese, sugars and vanilla. Fold in the brickle or toffee bits.  Refrigerate any leftovers. Serve with any variety of sliced apples. Enjoy!

For more family-friendly recipes like Chipper Chicken Soup or Chocolate Yummies and some easy crafts like my Simple Burlap Candle Holder, come on over and check out my little spot in the blogosphere.  I'd be delighted if you visited me.  You can find me here.

Thank you, Amy, for inviting me to share this recipe with your awesome readers. I am so honored you asked me to be a part of this series.

**********************************************
Doesn't that look just delicious?  mmmmmm!  I think it would go perfectly with my favorite Starbucks Fall Drink; Salted Caramel Hot Chocolate, don't you?  Thanks so much, Nici!
 

Happy Crafting, friends!
 
Pin It!
Related Posts Plugin for WordPress, Blogger...
Pin It button on image hover