One Artsy Mama One Artsy Mama One Artsy Mama One Artsy Mama blog lovin'
Showing posts with label blogging. Show all posts

July 3, 2013

Growing Your Blog: Why WordPress?

Have you heard the news?  This Friday, July 5, I will be making the move from Blogger to WordPress!


What does that mean for you?  Mostly just that I'll have a fun new design {don't worry, it won't be TOO different, and you'll still recognize the color scheme}.  Also, I won't be able to post any new content between Thursday night when the party goes live until I'm finished making design tweaks and ready to show the new site to the world!  You will still be able to find me at the same place, www.oneartsymama.com, and you can expect the same kinds of posts and projects you're used to.  So why am I switching?  Well, I'm glad you asked!

If you're a blogger who's been wondering about making the switch, or even just a reader who's interested, let me give you a quick overview of the three places/ways a gal can make a blog.

BLOGGER
- Totally free to create and run
- Hosted free by Blogger {Google}
- User-friendly and simple to edit
- You must comply with Blogger guidelines

WORDPRESS.COM
- Free to create and run unless you choose to upgrade to a paid template
- Hosted free by WordPress
- Has the option of adding plug-ins to further customize your site, help with SEO, and more
- You may NOT run ads or do sponsored posts on this platform

WORDPRESS.ORG
- Templates may be free or paid, depending on what you choose
- Self-hosted; you pay a company like GoDaddy, BlueHost, etc. for hosting services
- Fully customizable with plug-ins of all kinds
- You own your own content and may do as you like, as long as you comply with FTC guidelines
- Recommended by many blogging experts, and shows brands you are serious about blogging as a business

As you can see, there are advantages and disadvantages to each platform.  I don't think there's a single "right answer" or "one-size-fits-all" choice when it comes to deciding where and how to make your blog.  In my opinion, Blogger is probably the best option for hobbyists who are just getting started and are creating a blog as an outlet or something fun to do on the side.  If, on the other hand, you're serious about making your blog into a business and dedicating the time and effort it takes to grow a readership of several thousand followers, it's worth your time to go the WordPress.org route.  I've gone back and forth about making the switch for over a year now, and finally decided to close my eyes and jump!

Here are the major reasons why I decided to make the move.

1. I wanted to own my own content and not be at the whim of Google.  I personally know bloggers who have tried to log in to their Blogger sites one day and their accounts were locked because somehow Google flagged them as spam or in violation of a rule.  Most, if not all, of them eventually got their blogs back but not without a lot of hassle and anxiety.

2. I wanted the benefits of certain plug-ins.  I noticed some things my friends on WordPress were able to do with and for their blogs that weren't available to me...I was jealous, lol!

3. WordPress.org eliminates the need for a photo storage site.  Right now, I pay a subscription fee to Photobucket for hosting the pictures I use.  Once I make the switch, I can do that right on WordPress as part of my own hosting.

4. I can create guest users.  Now, I will be able to give folks who contribute to One Artsy Mama on a semi-regular basis, like Erin who posts her monthly Crafty Chaos projects, their own usernames and passwords.  This way, instead of sending me a typed document and a bazillion huge pictures that I'm supposed to format into a post, she can log in and create the post herself just like I would normally do. She'll have restricted access, so she can't go changing things around or deleting things {bahaha, sorry, Erin!}, but she can make any edits she wants to her own posts.  This is what I do when I guest post on sites like Somewhat Simple and Engaged Marriage, and it's so much easier!

5. The experts told me to.  Recently, I attended an online conference put on by The Blog Workshop and every speaker agreed that bloggers who wanted to make a great impression with brands and really make their blogs their jobs should be self-hosted.  I do know there are some "Big Bloggers" out there who are still on the Blogger platform, so obviously, you can still be successful there too, but I thought the benefits were worth the hassle of switching.

6. The initial investment is worth {in my opinion} the long-term returns.  Honestly, one of my big hang-ups about making the switch was the money.  Initially, I balked at the idea of a hosting fee {which ended up being way smaller than I anticipated}, paying someone to help me, and paying for a theme, but in the long run when I considered the money I'm bringing in and the increase in page views I expect, it's a wise business investment that wasn't even as expensive as I thought it would be.

Those are my reasons for packing up and moving this weekend.  Perhaps you're thinking it's not the right move for you...and if so, you're probably right!  But maybe you're intrigued and think this might be the next step for you and your blogging business.  If so, it's time to find and talk with someone who knows a lot about this and then hire someone you trust to help you with logistics.  I'm using Laura Summers {I can give you her info if you're interested}.  Unless you're a whiz with code, I really recommend getting help.  I thought about trying to do it on my own {and I do know a few people who did successfully move themselves}, but I don't have all the skills I need and I didn't want the responsibility.

I hope this helps to give you a better overview of your options and what might be best for you!  As for me, I'm anxiously waiting for Friday and I can't wait to unveil the "new and improved" One Artsy Mama!

Hugs & Glitter,

Pin It!

June 1, 2013

Growing Your Blog Mentoring Program: Summer Session

***UPDATE: THE SUMMER SESSION IS NOW FILLED.  PLEASE CHECK BACK IN SEPTEMBER TO PARTICIPATE IN THE FALL SESSION, WHICH WILL RUN FROM THE END OF SEPTEMBER THROUGH NOVEMBER.***

Hey, friends!  This past January, I ran the first session of the Growing Together Blogger Mentoring Program and it was a huge success!  Now, it's time for the summer session to begin!  
One Artsy Mama
 
Pin It!

January 4, 2013

Growing Together: A Blogger Mentoring Program

*Updated to add: Due to an overwhelmingly positive response, this session is now full.  I will hopefully be running this again starting in May, so if you missed the registration, stay tuned for next time!*

There are SO many things I know now that I wish I'd known when I was first starting One Artsy Mama.  After blogging for almost two years, I feel like I've learned so much about many aspects of the blogging world that I want to share with others to help them, wherever they are in their own blogging journey. 

One Artsy Mama
 

So, I came up with this idea.  It's a program...more like an online course, really, designed to help bloggers of all types and sizes meet their own blogging goals.  Here's how it works.

1. You sign up.  All you have to do is fill out the form at the bottom of this post. 

2. The course begins January 28 and runs through the last week of April.

3. Each week, I'll send out an email sharing insight about a particular topic and giving an "assignment" for participants.

4. Participants complete the assignments and receive one-on-one feedback from me, as well as the opportunity to discuss with each other in a private Facebook group.

I feel like the one-on-one mentoring as well as the camraderie of working together on the same topics will be a real benefit to whoever participates. 

Topics covered will include Blog Design, Branding, and Blog Promotion/Growth, specifically focusing on aspects like improving your photos, where and how to submit your ideas, finding your own voice, etc. 

Due to the amount of time and energy it's going to take for me to run the course, monitor the "assignments," interact and mentor one-on-one with each participant, and manage the FB group, the cost of the course is $20, or $10 plus a blog post about the program.  The post must be published at the time of your registration to receive the 50% discount {you'll enter the URL on the registration form}.  It should include the button, a link to the registration form, and a little bit about why you're signing up/what you hope to learn.  On the registration form, just select your payment option.  Then, I will send a paypal invoice to your email address.

That's all there is to it!  So, whether you're a new blogger, a blogger with a small following, someone looking to expand your blog's influence through sponsors and affiliates, or someone with a lot of different questions about it all, this program can help you reach your goals!  Registration closes January 23.  If you have any questions, email me at dancers4life{at}gmail{dot}com.  I'm so looking forward to this!


Pin It!

September 8, 2012

New Kids on the Blog

We all know how it feels to be the new kid, right?  

Yeah.  Not so fun. 
It's scary. 
It's overwhelming. 

You're trying to figure it all out
and make friends
and not say the wrong thing
and find your way around without getting lost...

Which is pretty much how it feels to be a new blogger {I know, I remember the feeling well}.  You're wondering what the heck is a link party and how to I join it.  You're looking at your seven followers, five of whom are your best friends, one of whom is your husband, and the other is your mom, and wondering how on earth blogs grow to have thousands of readers.  There's so much to learn and figure out, and one of the trickiest things is just getting yourself out there so everyone can see what you're all about. 

That's why for the next week, I'm going to be introducing you to some "new kids."

 
These girls have each been blogging for less than 6 months and/or have fewer than 100 followers.  I've invited them here to share a little about themselves and their blogs with you, as well as some fun tutorials and recipes they've come up with so that you can see how awesome they are.  There are no requirements here, but I know each one of them would love it if you'd take the time to stop by their blogs and see what they've accomplished so far.  Just a visit, a kind word, and a comment can go so far...as we all know.  Would you join me this week in welcoming these sweet New Kids on the Blog?


September 13: Shaunna from Tempting Thyme
 
September 14: Jeanette and Leigh from Crafty in Crosby
 
September 15: Jessica M. from Noguchi Designs
 
September 16: Jeannie from For What It's Worth - Jeannie
 
September 17: Jessica from Cox's Corner
 
 
Happy Crafting!


Pin It!

August 25, 2012

A bit of this and that...

Happy weekend, friends!  Don't forget to join the Shine on Fridays party, going on now!  In the meantime, I have a few random things I just had to share with you this morning.

1. I bought my domain!  What does that mean?  Well, it means that now you can find me by typing in:
Woohoooooo!  I. am. excited.  No more oneartmama.blogspot.com, although if you type that, it'll still bring you here.  Simpler, easier to remember, and oh-so-official, right? :)  Which of course means I need new business cards too:
 
 
2. I'm a "winner winner chicken dinner!" Thanks to everyone who voted for my quilt square over at Happy Hour Projects!
 

My block came in second place, which means I receive a quilt pattern and a gorgeous fat quarter bundle...wanna see?
 
 
Congratulations to Elaine, the first place winner, who made a gorgeous rainbow block {that I voted for}...her block is really worth seeing; you should stop by and congratulate her too!
 
3. I need your help.  Specifically, if you're a blogger who has a piece of advice to share.  I'm working on the next installment of the Grow Your Blog series and I want to hear the one best tip you have.  Of course I'll credit you for your idea as well as linking to your blog in my post.


4. LC has his first karate lesson today!  Pics to come, of course!

5. Check out the first One Artsy Mama "Pin it to Win it" challenge.  You'll find it on Facebook.  All you have to do is pin one or more of the posts related to LC's lego party on Pinterest.  Then, leave the URL of your pin as a comment on the FB post as your entry.  You may enter once for each separate pin. 

Until next time, Happy Crafting!

Pin It!

August 20, 2012

Things I Love Monday

Today, I wanted to share with you a few completely random things that have made me smile recently.

1. Unexpected Presents!
A few weeks back, I featured some tiny trees made by Frances at My Laughing Lion.  She had shared them at Shine on Fridays, and I thought they were adorable.  I commented in the feature post that I wished I had one for my dresser, and do you know what that sweet girl did?  She sent me one!  Not just any one, but one she made specially for me using the birthstone colors for myself, hubby, and Little Crafter!  Isn't this gorgeous?!  Love!  Thank you, thank you, thank you, Frances!


2. Recipes I can actually make!
Did you catch Sunday's post?  I shared about how much I'm in need of yummy lactose-free recipes to make for my hubby.  I always drool over the recipes many of you share on Fridays, but can't make them for my family since the hubs can't eat them.  Of course, you all came to the rescue and have already shared some great-looking things I can really try!  Missed it?  Stop by and share your own milk, cheese, and cream-free recipes!


3. Meeting four of the Baltimore Ravens players!!!
If you've been following One Artsy Mama for any length of time, you probably know that we are crazy about the Ravens!  We heart our home team!  Recently, we had an opportunity to meet four of the players and get their autographs on Little Crafter's football.  Take a look...

Here's LC with Cornerback Cary Williams.

We got to meet one of this year's fourth round draft picks, Safety Christian Thompson.
I have no idea what LC is doing to my head.

This is Wide Receiver Tandon Doss...check out that wild tattoo!

And here we are with Terrence Cody, Defensive Tackle.  I feel like a small child next to him, lol.
The best part was LC teaching Cody to do his special fist bump that my friend Kristen made up.  It's just a fist bump that you explode, but you say "Potato...French Fries!" when you do it.  Cody approved.  If you see him do it with his teammates on tv this season, you'll know where he got it, lol.


and, finally...
4. Exciting things just around the corner.
Fall is coming before we know it, and with it there are some exciting things on the horizon.  One, of course, is that the fall drinks will hit Starbucks cafes on September 1.  I'll have to say goodbye to my much-loved mocha coconut for another year, but I'm all about that salted caramel hot chocolate.  And of course, there's also pumpkin spice lattes...need I say more?  But beyond Starbucks, there are also a few things coming that I'm pretty psyched about.  First, there's a new party coming your way, co-hosted by yours truly and two of my bestest blog buddies with a special theme that's sure to be lots of fun.  And, there's the possibility that I may or may not be in the very early stages of working with another good buddy of mine to organize a one-day blog conference here on the East Coast in the MD/DC/VA area that would take place probably this Spring.  More info about all of those things will be coming soon!  But I'm excited.  Really excited.  And I hope you will be too...


Pin It!

June 16, 2012

Growing Your Blog: Reposting Etiquitte

Welcome to another installment of the Growing Your Blog Series!  Today we're going to be talking about the proper {at least according to me...lol} etiquitte for when you want to share a great idea you saw on someone else's blog.
From time to time, all of us see something somewhere else that we think is SUCH a great idea we have to share it with our readers, right?  That's part of the fun of blogging, all the inspiration we're able to gain and share.  And, done correctly, the person who came up with the idea will benefit from you sharing it as well.  But, done incorrectly, it can cause hard feelings and even become a copyright violation in some cases.  Here are some rules to follow when you want to repost someone else's idea.

There are three different scenarios in which we might want to share something created by a fellow blogger, and each has different guidelines.

SCENARIO 1: Someone inspired you with their project and you made your own version.

For this situation, the emphasis is on your own project.  It's totally fine to write the post as a normal tutorial, showing pictures of your work and the steps you followed.  Just make sure you put a link to your original inspiration, lest they and your readers think you're trying to claim their idea as your own.  You can simply credit them with a text link, saying something like, "I saw this fabulous Sentimental Word Art linked up at our party by Karah from The Space Between. I liked it so much I featured it, and then I just had to make my own version."
If you like, you can also copy and paste an image of your inspiration too so that your readers can see it.  Sometimes I do this, sometimes not, depending on the project.  The plus side is that it gives the original creator more exposure and is fun to see for your readers, the down side is that if it's the first image in your post, people might pin that photo instead of a photo of your actual project, which happened to me {a lot!} with my covered clothespins.  {The left image is my inspiration from Vixen Made; the right photo is my take on it!}
So, in summary, for this scenario, here are the:
RULES:
1. Use a text link to the specific post where your idea came from.
2. {Optional} include one photo of the inspiration.

*****************************************************
SCENARIO 2: You're doing a round-up or featuring projects from a link party.
The goal of featuring projects from your party or collecting projects you like that go with a particular theme is to give exposure to the people who created them, right?  Bloggers love to be featured, especially if your blog happens to be bigger than theirs, because done correctly  it will bring traffic their way.  The idea is that people will see the project, be interested, and click to visit the creator's blog for more information...which is why it's important to use the link for the specific post and not just the person's blog homepage.  Readers will be frustrated if they want to see a particular tutorial and end up on a homepage instead where they have to search for it.  This kind of featuring really does benefit the other blogger; for example, Jen from Tatertots and Jello was sweet enough to include my clothespin magnets {pictured above} in one of her roundups a few months back and according to my stats, that particular post is my 9th highest traffic source of all time!  Crazy!  When you're featuring another project in this manner, the best way to go is:
RULE: Use one good photo and a clear text link to the specific post.
For example:

Patriotic Jar Lanterns: Here's to Handy Andy
*****************************************************
SCENARIO 3: You see an idea you like on another blog and just want to share it.
So it's not something you've made yourself, and it's not an official party feature or roundup, you just like it and you think your readers will too.  What do you do?  Well, here's what NOT to do.
Never copy and paste an entire post!!!
The only time you should have an entire post written by someone else on your own blog is if you have a guest poster.  We all spend a lot of time and effort on each post we publish, and none of us wants to feel as though our work has been stolen.  Recently, I got an email from a sweet bloggy friend who found out that someone had copied and posted one of her tutorials...the title, the content, the photos, everything.  The other blogger had given her credit in a quick little text link at the top of the post, so I'm sure she didn't intend for it to look like she was stealing content, but we all know that  readers don't always read every single word of every post we write, right?  Send me a Starbucks gift card now.  You know you want to.  Haha, just checking.  Still with me?  Reading every word?  In all seriousness, though, people often skim, looking for the photos and the tutorial they want to see.  I'm guilty of it, and you probably are too.  So it's easy for someone to miss that quick little byline, know what I mean?  Which, even if the blogger had the best intentions, makes a lot of people think the project and post were her own.  Plus, it doesn't drive any traffic to my friend's blog because everything is already right there for readers to see.  Make sense?  So what's the best way to show your readers something you think is really cool?

RULE: Use one or two photos and a link to the specific post.  Give your readers a little tease telling them why they need to go see the project, then let them click over to the actual blog to find out more information.

For example, you could post something like this:

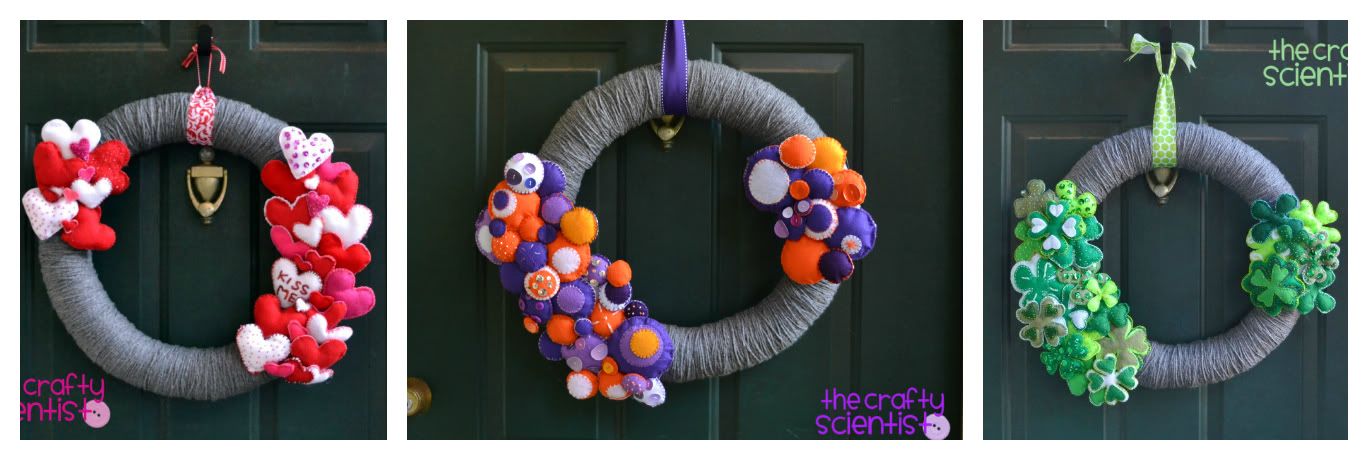
"Have you ever wished that instead of making a new wreath for every season, you could somehow just change the one you already have?  Mel over at The Crafty Scientist has figured out how to make a fun interchangable wreath that you can decorate for every season without damaging any of the parts!  You're going to love it; check out her post for a full tutorial!  Great work, Mel!"
********************************************************************************
In closing, I want to say one other thing that applies to any and all scenarios when you might be posting about someone else's work.
Take the time to read and respect fellow bloggers' wishes regarding their photos and content.
Many bloggers have a little blog policy blurb somewhere on their homepage giving information with respect to what they do and don't wish to be done with their intellectual property. 

Here's mine:
The contents of this blog, including text, original photos and ideas are the sole property of the author.  If you intend to use my text or images, please link back to this blog and give credit to One Artsy Mama.  Please do not republish an entire post or post photos of my family.
A notification email would be greatly appreciated too!

Allison, over at House of Hepworths, says it this way:
Bloggers/websites may NOT repost my blog content without my express permission. My tutorials belong exclusively on MY blog. They are my intellectual property. I've spent countless hours making these projects and I don’t want them living on someone else's site.
HOWEVER, linking to my project is perfectly fine and I encourage it! Those who link to a project of mine are welcome to take one or two photos and link each photo back to that specific post.

Some bloggers will limit how many photos they want you to use, others will ask you to refrain from posting photos with family members, and others will have various specific "rules" they want you to follow when it comes to reposting.  Being aware of and respectful of those things will go a long way.  After all, the blog community is a rather tightly knit one and it's much better to have friends than enemies who think you're trying to rip off their content, right?
Pinned Image
Also, if you don't have a blog policy on your own site, you may want to consider adding one!

Whew, ok.  That was a lot of info, huh?  But I feel like this is an important topic and worth addressing.  Was it helpful?

Happy blogging!


Pin It!

May 17, 2012

Growing Your Blog: The Right Equipment


Yesterday, I shared some simple tips for improving any and every photo you post on your blog {or use personally}.  Today, I want to talk about the equipment that makes your photos the best they can be.

THE CAMERA 
Can you get good photos from a simple point-and-shoot camera? Yes. Will they be better with a DSLR camera? Absolutely.

We bought my Nikon D60 after LC was born because we decided it was worth the investment to have good quality photos of his childhood that we'll treasure forever. A good DSLR {I'd recommend a Nikon or a Canon} usually starts around $500 for the basic camera itself.
Look at these two pics of LC {isn't he tiny?!} that I took within a few weeks of each other. The first one was taken with a point and shoot. The second was taken with the Nikon D60. Look at the difference in brightness, clarity, and aperture.
In fact, I've found that I can take such high quality photos using my DSLR camera that we no longer pay to have professional portraits done.  I took these shots myself at the beach and we used them for LC's birthday photos.
To get family photos for Christmas cards and such, we just set up a tripod and get way better pictures than we ever got when we tried going somewhere to have them done.  LC is more relaxed because he's at home, and the camera does the work for me.

The only occasions when I use a point and shoot instead of the DSLR are ones where I don't want to lug the big camera {"the beast"} around...ie, when we're hiking in the woods.

I know that especially in this economy, most of us don't have $500 to throw around here and there, but if and when it's within your means, I can almost guarantee you wouldn't regret the purchase...plus, then you can make a cool camera strap cover for it and blog about it, right? 

{You can also enter to win a Canon 5D Mk III here}

******************************************************
THE LENSES
Of course there are other accessories you can get too, if you decide you want to invest in them. {Or you can do what I do and ask your family for them for Christmas and your birthday...} The first extra I got was what I lovingly refer to as my "creeper lens," aka a Macro lens.  Ordinarily, the best lens for the job is the one that came with the camera.  But, sometimes it's nice having one I can switch to that can zoom in much farther.  I honestly don't use it often, but when I do, it's really nice to have.  Here are the places I've found it to be helpful:

SPORTS GAMES
Here's a comparison of how the field actually looked from our seats and how much I could zoom in on the players.


While they were warming up, we were allowed to stand closer to the field, where I could get shots like this one.
 

THE ZOO
Trust me, this is all the lens...we were nowhere near this close to the animals.


A macro lens runs around $275-300 for a basic version.  I find that it's not really necessary for any of the pics I take for my blog, but some people may find it helpful.  I just like it so I can zoom in on things at games, zoos, and the beach.

********************************************************
THE FLASH
Nikon SB-700 Speedlight Shoe Mount Flash
One of the best investments I my parents ever made was getting a Speedlight {attachable flash} for my camera.  You can bounce the flash off different spots to achieve various effects, and you won't believe the difference it makes!  Here are two photos, both taken with the same camera, the only difference being the use of the speedlight.


The speedlight I use is the Nikon SB-700, which runs beween $300-400.  I use it constantly, anytime we're indoors.

********************************************************
THE SOFTWARE
No matter what kind of camera you have, you're also going to want some good software.  You can use an online editor, like PicMonkey, which is technically free but is eventually going to have a yearly subscription if you want to use all of the tools.  You can also purchase software to download and use...many companies offer a free trial version which lets you test-drive it and see how you like the features.  Here's a quick guide to what might be best for you.

BASIC: CameraBag 2 software retails for $29 {currently 25% off with the code CB2SALE} which is an affordable way to get started.  I was given a free liscense to test it out for you, and I found it to be very user-friendly.  It has great options for filters, colors, and styles as well as some borders.  If you're basically just looking to crop, resize, and adjust the color/exposure of your photos, this software is a fantastic choice for you!
Here's some pics from Mother's Day that I edited using CameraBag 2.

ADVANCED: Corel Paint Shop Pro software retails for $99 {right now it's on sale for just $49} and is for more advanced users.  It has just about every feature you can imagine.  I use this for creating buttons and headers, as well as editing photos.  It allows you to clone, fix blemishes, add text, work with multiple layers, and do all kinds of crazy things, like this.
I have some friends who use Adobe Photoshop, which I believe is pretty comparable but more expensive.  I'd be interested to know what additional features it offers, because I'm sure there's something to explain the pricing difference.


Today, I get the fun job of offering five lucky readers FREE liscenses to CameraBag 2
And remember, they're holding a sweepstakes on their page for a Canon camera too!
Enter here to be one of the lucky five; Rafflecopter will walk you through the entry process.  Good luck!


Pin It!

May 16, 2012

Grow Your Blog: Posting Better Photos

Well, friends, I've been up to my ears lately in One Crafty Contest {aren't you excited to see what our contestants are going to come up with for Round 1?!} but I wanted to take some time today to post the newest installment of the Grow Your Blog Series.
Today, we're going to talk about posting better photos!


When someone visits your blog to read a post, one of the first things he or she will notice is the photos.  Especially for those of us who blog about craft projects, home decor, fashion, and/or food, our readers are more interested in seeing what we're talking about than reading about it.  Here are some tips for making your photos the best they can be:

PREPARING TO PHOTOGRAPH:

Pay attention to your background.

 Make sure your photo isn't cluttered with a bunch of unneccessary stuff.  Try to photograph your projects on a simple background, like something white, something black, or something wooden. 


Or, you can also "stage" your project, like this photo from ArteBella Surplus.  Here,  spoon enhances rather than distracting from the beads, and shows a size reference so that customers know how big they are.
SPRING WATERS .. Picasso Glass Czech Rondelle Beads (1982)

************************************************
WHILE YOU'RE PHOTOGRAPHING

Use natural light whenever possible!
It's just better.  Really.

Take multiple shots of your subject, snapping from different angles and heights.
One of the blessings of digital cameras is that we don't have to pay for photos we don't use, so snap away!  Take fifty pics, then decide which ones are the best.  You'll be surprised how things look from different vantage points, as you can see in these examples from my friend Jen at Sunny Vanilla.


Use your zoom.
Don't limit yourself to just photos of the entire project, zoom in and capture the details.  Trust me, your readers will want to see, especially if they're going to try and reproduce your project.

 
******************************************************************
AFTER YOU PHOTOGRAPH

Do some basic editing before you post your photos.

You don't have to be an editing pro to enhance and improve your photos.  All you need is access to some basic editing software, which you can find on the web, like PicMonkey, or purchase, like CameraBag, Corel Paint Shop Pro, or Adobe Photo Shop.  These are a few of the things I routinely do before any photo goes into a post.

Crop your picture to emphasize your subject goes a long way.  Trim out anything that isn't necessary.

Brighten photos that are too dark.

Resize photos so they don't take forever to load.  Mine are usually resized to around 600 x 800 pixels.  Then, when you post them, choose the large or x-large option so that your readers can really see them!

Add a Watermark
In today's digital world, it's very easy for someone to grab your photos right off your blog, Pinterest, or Facebook for whatever purpose they want.  I've done this plenty of times when I've featured projects, always being sure to give credit to the original source.  However, there are folks out there who {either unintentionally or not} will repost your photos without giving you the credit and link-back you deserve.  I've actually heard awful stories from other bloggers, like Allison from House of Hepworths, about people stealing their images and writing up posts about them as if they had created the project personally.  One way to combat this is by putting a watermark on your photos.  All you have to do is use the text feature in any photo editing software, type your blog name, and place it somewhere on the photo.  You can change the color and/or fade it so it has the appearance you want.  That way, no matter where the photo ends up, it always has your name on it.

Consider adding text.
You probably don't want to write on every photo you post, but if you're writing about a craft or recipe, it can be helpful to include a title on one of your main images.  That way, if someone pins it, they {and everyone else} can see exactly what it is.  We've all seen examples where people didn't bother to write a description on Pinterest or wrote something like "for Bobby's room" that has nothing to do with what the thing is, and then a bunch of people just repin it.

**********************************************************************

I wanted to include so much more in this post, like how to equip yourself with a good camera, accessories, and photo software, but I just plain ran out of room and the post was waaaaay too long.  So, I split it up and tomorrow you can come back and read about those things.
Don't miss it; there's going to be a giveaway for FIVE free liscences to the new CameraBag editing software as well as a link to win a Canon 5D Mk III {aka a really nice camera}.

As always, I welcome your feedback and questions about anything you read here.  Talk to me!

Till then, Happy Photographing!
Pin It!
Related Posts Plugin for WordPress, Blogger...
Pin It button on image hover