Friends, I can't wait to show you one of the things I made hubby for Father's Day! {Here's hoping he behaves and doesn't come peek!} I am crazy-excited about this! Here it is...
Yup, you read that right. A gorgeous wrapped photo canvas you make yourself at home!
Showing posts with label photo enhancement. Show all posts
June 13, 2013
December 11, 2012
Handmade Holidays: Personal Photo Frames
Still looking for cheap, easy DIY gift ideas? Yeah, me too. Here's one of the ideas I came up with for hubby's dad. He absolutely loves photos of Little Crafter, and I got a really great one of the two of them together at an Orioles game this summer. I wanted to make it a little extra-personal, so I came up with this idea. LC calls him "Poppy," and of course you can never find gifts with that name on them...it's always "Grandpa," so I decided to do it myself!
Materials:
- photo frame, any size {you can get nice ones for just a few dollars at Walmart, Target, or the Dollar store}
- sponge dauber
STEP 1: Clean your glass.
STEP 2: Position adhesive stencils.
I actually found it easier to do when I left the glass inside the frame. That way I could use the edge of the frame to help me line them up, and I knew that none of the letters would get cut off by the frame when I put it together.
STEP 3: Use sponge dauber to fill in stencils with paint. Remove while wet.
STEP 4: Once your paint dries, you can insert your photo, and voila!
I also used the same technique to make a special Christmas gift for my friend who has three gorgeous children. I got a frame that holds three photos, "borrowed" some of her pics from Facebook, stenciled their names, and ended up with this.
Love and glitter,
Labels:
gift ideas,
handmade holidays,
painting,
photo enhancement
May 17, 2012
Growing Your Blog: The Right Equipment
Yesterday, I shared some simple tips for improving any and every photo you post on your blog {or use personally}. Today, I want to talk about the equipment that makes your photos the best they can be.
THE CAMERA
Can you get good photos from a simple point-and-shoot camera? Yes. Will they be better with a DSLR camera? Absolutely.
We bought my Nikon D60 after LC was born because we decided it was worth the investment to have good quality photos of his childhood that we'll treasure forever. A good DSLR {I'd recommend a Nikon or a Canon} usually starts around $500 for the basic camera itself.
Look at these two pics of LC {isn't he tiny?!} that I took within a few weeks of each other. The first one was taken with a point and shoot. The second was taken with the Nikon D60. Look at the difference in brightness, clarity, and aperture.
In fact, I've found that I can take such high quality photos using my DSLR camera that we no longer pay to have professional portraits done. I took these shots myself at the beach and we used them for LC's birthday photos.
To get family photos for Christmas cards and such, we just set up a tripod and get way better pictures than we ever got when we tried going somewhere to have them done. LC is more relaxed because he's at home, and the camera does the work for me.
The only occasions when I use a point and shoot instead of the DSLR are ones where I don't want to lug the big camera {"the beast"} around...ie, when we're hiking in the woods.
I know that especially in this economy, most of us don't have $500 to throw around here and there, but if and when it's within your means, I can almost guarantee you wouldn't regret the purchase...plus, then you can make a cool camera strap cover for it and blog about it, right?
{You can also enter to win a Canon 5D Mk III here}
******************************************************
THE LENSES
Of course there are other accessories you can get too, if you decide you want to invest in them. {Or you can do what I do and ask your family for them for Christmas and your birthday...} The first extra I got was what I lovingly refer to as my "creeper lens," aka a Macro lens. Ordinarily, the best lens for the job is the one that came with the camera. But, sometimes it's nice having one I can switch to that can zoom in much farther. I honestly don't use it often, but when I do, it's really nice to have. Here are the places I've found it to be helpful:
SPORTS GAMES
Here's a comparison of how the field actually looked from our seats and how much I could zoom in on the players.
While they were warming up, we were allowed to stand closer to the field, where I could get shots like this one.
********************************************************
********************************************************
Today, I get the fun job of offering five lucky readers FREE liscenses to CameraBag 2!
SPORTS GAMES
Here's a comparison of how the field actually looked from our seats and how much I could zoom in on the players.
While they were warming up, we were allowed to stand closer to the field, where I could get shots like this one.
THE ZOO
Trust me, this is all the lens...we were nowhere near this close to the animals.
A macro lens runs around $275-300 for a basic version. I find that it's not really necessary for any of the pics I take for my blog, but some people may find it helpful. I just like it so I can zoom in on things at games, zoos, and the beach.
THE FLASH
One of the best investments I my parents ever made was getting a Speedlight {attachable flash} for my camera. You can bounce the flash off different spots to achieve various effects, and you won't believe the difference it makes! Here are two photos, both taken with the same camera, the only difference being the use of the speedlight.
The speedlight I use is the Nikon SB-700, which runs beween $300-400. I use it constantly, anytime we're indoors.
THE SOFTWARE
No matter what kind of camera you have, you're also going to want some good software. You can use an online editor, like PicMonkey, which is technically free but is eventually going to have a yearly subscription if you want to use all of the tools. You can also purchase software to download and use...many companies offer a free trial version which lets you test-drive it and see how you like the features. Here's a quick guide to what might be best for you.
BASIC: CameraBag 2 software retails for $29 {currently 25% off with the code CB2SALE} which is an affordable way to get started. I was given a free liscense to test it out for you, and I found it to be very user-friendly. It has great options for filters, colors, and styles as well as some borders. If you're basically just looking to crop, resize, and adjust the color/exposure of your photos, this software is a fantastic choice for you!
Here's some pics from Mother's Day that I edited using CameraBag 2.
ADVANCED: Corel Paint Shop Pro software retails for $99 {right now it's on sale for just $49} and is for more advanced users. It has just about every feature you can imagine. I use this for creating buttons and headers, as well as editing photos. It allows you to clone, fix blemishes, add text, work with multiple layers, and do all kinds of crazy things, like this.
I have some friends who use Adobe Photoshop, which I believe is pretty comparable but more expensive. I'd be interested to know what additional features it offers, because I'm sure there's something to explain the pricing difference.
Today, I get the fun job of offering five lucky readers FREE liscenses to CameraBag 2!
And remember, they're holding a sweepstakes on their page for a Canon camera too!
Enter here to be one of the lucky five; Rafflecopter will walk you through the entry process. Good luck!
Labels:
blogging,
photo enhancement,
photography
May 16, 2012
Grow Your Blog: Posting Better Photos
Well, friends, I've been up to my ears lately in One Crafty Contest {aren't you excited to see what our contestants are going to come up with for Round 1?!} but I wanted to take some time today to post the newest installment of the Grow Your Blog Series.
Today, we're going to talk about posting better photos!
When someone visits your blog to read a post, one of the first things he or she will notice is the photos. Especially for those of us who blog about craft projects, home decor, fashion, and/or food, our readers are more interested in seeing what we're talking about than reading about it. Here are some tips for making your photos the best they can be:
PREPARING TO PHOTOGRAPH:
Pay attention to your background.
Make sure your photo isn't cluttered with a bunch of unneccessary stuff. Try to photograph your projects on a simple background, like something white, something black, or something wooden.
Or, you can also "stage" your project, like this photo from ArteBella Surplus. Here, spoon enhances rather than distracting from the beads, and shows a size reference so that customers know how big they are.

************************************************
WHILE YOU'RE PHOTOGRAPHING
Use natural light whenever possible!
It's just better. Really.
Take multiple shots of your subject, snapping from different angles and heights.
One of the blessings of digital cameras is that we don't have to pay for photos we don't use, so snap away! Take fifty pics, then decide which ones are the best. You'll be surprised how things look from different vantage points, as you can see in these examples from my friend Jen at Sunny Vanilla.
Use your zoom.
Don't limit yourself to just photos of the entire project, zoom in and capture the details. Trust me, your readers will want to see, especially if they're going to try and reproduce your project.
******************************************************************
AFTER YOU PHOTOGRAPH
Do some basic editing before you post your photos.
You don't have to be an editing pro to enhance and improve your photos. All you need is access to some basic editing software, which you can find on the web, like PicMonkey, or purchase, like CameraBag, Corel Paint Shop Pro, or Adobe Photo Shop. These are a few of the things I routinely do before any photo goes into a post.
Crop your picture to emphasize your subject goes a long way. Trim out anything that isn't necessary.
Brighten photos that are too dark.
Resize photos so they don't take forever to load. Mine are usually resized to around 600 x 800 pixels. Then, when you post them, choose the large or x-large option so that your readers can really see them!
Add a Watermark
In today's digital world, it's very easy for someone to grab your photos right off your blog, Pinterest, or Facebook for whatever purpose they want. I've done this plenty of times when I've featured projects, always being sure to give credit to the original source. However, there are folks out there who {either unintentionally or not} will repost your photos without giving you the credit and link-back you deserve. I've actually heard awful stories from other bloggers, like Allison from House of Hepworths, about people stealing their images and writing up posts about them as if they had created the project personally. One way to combat this is by putting a watermark on your photos. All you have to do is use the text feature in any photo editing software, type your blog name, and place it somewhere on the photo. You can change the color and/or fade it so it has the appearance you want. That way, no matter where the photo ends up, it always has your name on it.
Consider adding text.
You probably don't want to write on every photo you post, but if you're writing about a craft or recipe, it can be helpful to include a title on one of your main images. That way, if someone pins it, they {and everyone else} can see exactly what it is. We've all seen examples where people didn't bother to write a description on Pinterest or wrote something like "for Bobby's room" that has nothing to do with what the thing is, and then a bunch of people just repin it.
**********************************************************************
I wanted to include so much more in this post, like how to equip yourself with a good camera, accessories, and photo software, but I just plain ran out of room and the post was waaaaay too long. So, I split it up and tomorrow you can come back and read about those things.
Don't miss it; there's going to be a giveaway for FIVE free liscences to the new CameraBag editing software as well as a link to win a Canon 5D Mk III {aka a really nice camera}.
As always, I welcome your feedback and questions about anything you read here. Talk to me!
Till then, Happy Photographing!
Labels:
blogging,
photo enhancement,
photography
November 15, 2011
Homemade Holiday Gifts: #2
Hi, friends! If you missed yesterday's post, this week I'm sharing my top five ideas for Homemade Holiday Gifts! Here's what we have so far:
2. Personal Photos
A framed photo can be such a treasure. I've found that grandparents and great-grandparents in particular just can't get enough of them! And if you've got some photo shop skills, adding a few effects and some text makes them extra special. One thing you can do is take a cute photo of your child{ren} and put memorable information on it to summarize their year.
Adding a meaningful quote or definition turns an ordinary photo into a one-of-a-kind keepsake.
As an alternative to simply framing the picture, you can mod podge it onto a painted wooden plaque like this one and turn it into a piece of unique home decor. You can do anything from a 4x6 up to a large wall hanging. See here for a full step-by-step tutorial of how I made this one.
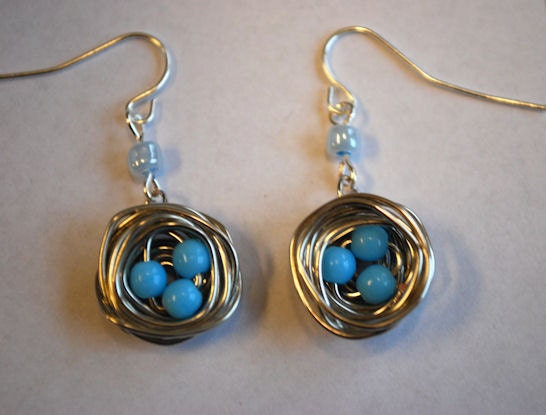
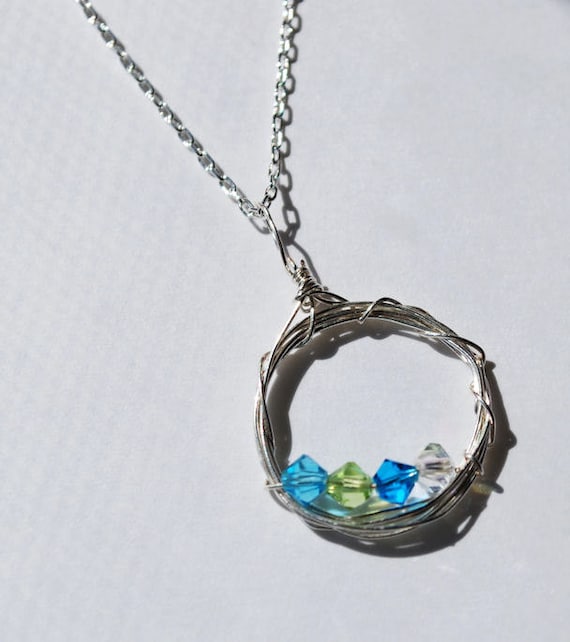
Another alternative to a traditional frame is to turn a photo into personalized jewelry. See here for how to do it yourself!
If you want to get your own Little Crafter{s} involved, get some wooden frames at your local craft store and let them go to town with acrylic paints. This frame cost $1 at Michaels...definitely within the budget! You can't beat an adorable kid photo in a frame he or she decorated!
And, one last idea to involve the littlest of hands, frame a special photo side by side with a piece of a child's artwork. This is one of Little Crafter's first fingerpaintings. A crayon drawing or any other kind of art works too!
Finally, you can use your photos to make a memorable keepsake wall or desk calendar. Walmart.com, Snapfish.com, and lots of other photo sites make it very easy to upload your photos and create a one-of-a-kind calendar that I guarantee will be a hit with doting grandparents everywhere. My personal favorite site to use is Mixbook. Their layouts are just gorgeous, and they often run sales and specials, so watch for those!
Photographs are such treasures to begin with, and adding any of these personal touches makes them an even more meaningful gift that anyone would love to receive. What's your most treasured photo?
Come back tomorrow for another fun homemade gift idea, and don't forget to share your projects at the {Our} Home for the Holidays party!
PS - I am thrilled to be guest posting at Katie's Nesting Spot today with a simple jewelry tutorial! I'd love for you to go visit me there too!
Labels:
Christmas,
gift ideas,
holiday crafts,
holidays,
jewelry,
photo enhancement
October 4, 2011
Buttons, Blogging, and Business
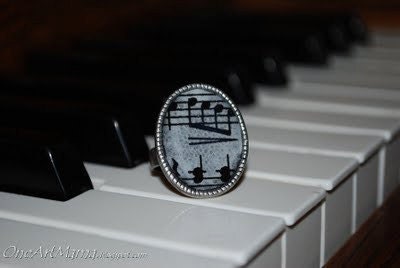
If you've ever visited the One Artsy Mama Etsy shop, you know that one of my favorite things to do is make jewelry. When I opened the shop this past Spring, I intended for it to be a place to showcase and sell the necklaces, bracelets, earrings, and rings I was having so much fun creating.

It seemed like a pretty low-risk way to put myself out there because the listing fees are minimal and if I didn't sell anything, I wouldn't really have anything to lose.
Then, I learned how to make fabric flowers and thought they would be a good addition to my shop; after all, they're great accessories too, for your hair, your shirt, or your bag.

My original assumption was that the shop would be a place for jewelry and accessories, and that was good enough for me. Until I started playing around with digital design.
For several years now, I've had fun playing around with Corel Paint Shop Pro to edit and enhance photos, and even to create one-of-a-kind invitations and announcements. When I started this blog, I had fun playing around with those same tools to create my background, a header, and buttons. As the blog has grown, I've enjoyed making a featured button, sidebar dividers, social media buttons, special event buttons, and a new more streamlined header. But as much as I love my fun flowery design, sometimes I get a little bored always using the same colors and elements. I was itching to do something new and different, so I made a custom digital file one of the items up for grabs during Great Giveaway Weekend.
My fabulous buddy Creative Carmella was the first winner, and she chose a birth announcement for that precious new baby of hers.
The second winner was Rachel, who recently started a blog called Wooden Parlor. She requested a blog button. I had fun looking at her current design and trying to come up with something compatible.
I also had the opportunity to design a new blog button, social media buttons, and a feature button for Carrie at My Favorite Finds. She gave me her color scheme, and I took a look at her existing design before creating this:
And, I recently had the opportunity to design a special event button for the fabulous Nicole at Three's{4}Me. The tricky part was that she had won a blog makeover but the new design wasn't up yet. She told me to go with teal and yellow, so I came up with this, which I really loved:
Buuuuut....we both agreed {once I saw the new design} that it wasn't compatible with the overall look of her blog. So, I gave it another go, and this one is much more in keeping with her existing colors and design.
All that to say, I've been having such fun working with blog design lately that I decided to officially add it to my Etsy shop. So far, I listed a custom blog button; it's 125x125 and comes with 3 revisions, plus the code to put it on your blog and include a grab box. I hope that before long, I can get around to adding headers, social media buttons, and other options as well. I'm still so new to Etsy in general, but I'm at least having fun figuring it out. And, I'm hoping to gain some wisdom from the very event that my newest button promotes.
Nicole is hosting a Small Business Month through the end of October where she's featuring Q&A sessions with successful businesswomen, linky parties, giveaways, guest posts, and advice for anyone with a small business. I'm hoping to learn a lot. And in the meantime, I'm just going to keep enjoying the creative process, because when it stops being fun to make the jewelry or do the digital design, that's when I know my priorities are wrong. What about you? What do you love to create?
Labels:
blogging,
photo enhancement
Subscribe to:
Posts (Atom)


b.jpg)